
ExpenseBot Guide & FAQ
Let AI Handle Your Expenses
Forward receipts, snap photos, or let Gmail auto-scan. Your data stays in YOUR Google Drive.
Join 2,500+ businesses already saving hours every month
You'll sign in with Google next. Gmail scanning is optional and connected separately.
Start Free 60-Day Trial →No credit card required
Quick Start Guide
Watch the 2-Minute Overview
This short video shows you everything you need to get started with ExpenseBot — how to capture receipts (email, photos, PDFs, Gmail), create a report, and share it with your accountant or finance team so they can import it into their accounting system.
Watch the Quick Start video:
Configuration & Setup
ExpenseBot has five main work modes. Pick the one that matches who you are, not what features sound nice — the wrong one at signup means a different default layout, different reports, and (for Accountant) a different pricing tier.
- Freelancer: Sole proprietor, self-employed, or contractor. You file your own taxes — Schedule C in the US, T2125 in Canada, equivalent year-end summaries elsewhere. Most ExpenseBot users start here.
- Employee (Reimbursement): You use ExpenseBot to track expenses for reimbursement from your employer. No tax forms or deduction categorization — pure receipt capture and reimbursement export.
- Incorporated: Owner of a small corporation (Inc., LLC, Ltd., Corp.). Behaves like Freelancer — same deduction tracking, same Suggested Reports — minus the Schedule C / T2125 worksheet (because your corporation files Form 1120 / T2, not personal returns). Output is clean G/L data your accountant uses.
- Team Admin: Multi-user — your company has employees who use ExpenseBot together. The owner is seat one; add seats as teammates join. You manage team settings, categories, approvals, and team members under one subscription.
- Accountant / Bookkeeper: You manage other people's books — invite clients, review reports, check compliance, and export to accounting software. Managing clients is free; a client's paid scanning features require their own subscription or accountant sponsorship.
The most common mix-up: "I want to invite my team and pay for their seats" → choose Team Admin, not Accountant. Accountant is for managing clients outside your organization.
Switching after signup: changing between business roles requires support because each role changes reports and spreadsheet structure. Email support@expensebot.ai with your current and intended role. Switching between business and Personal tracking is available directly in Settings.
ExpenseBot also offers narrower starting points for Realtors (mileage-heavy), Agencies (bill-back to clients), and Executive Assistants (manage another person's expenses on their behalf). These all live in the same picker at signup.
If you set up as a business or freelancer but you're really tracking personal/household spending, switch anytime: Settings → change your role → Personal tracking. Personal mode removes the tax/business tools you don't need and unlocks personal-focused reports like the Spending Breakdown.
Your data stays put — nothing is deleted; you're just changing the lens. You can switch back any time.
The Agent Configuration page lets you customize how ExpenseBot works for you — set up email preferences, configure automation settings, and personalize your expense tracking workflow.
Configuration options include:
- Gmail scanning: Enable automatic receipt capture from your inbox
- Email notifications: Choose when to receive processing updates
- Default currency: Set your home currency for multi-currency conversion
- Expense categories: Customize categories to match your business
- Auto-sharing: Set up automatic report sharing with your accountant
Take a few minutes to configure ExpenseBot when you first sign up, and the AI will handle expense tracking exactly the way you need it. Most settings can be changed anytime as your needs evolve.
Some companies require expenses to be submitted with specific accounting codes (G/L codes). Add your G/L codes to ExpenseBot and it will automatically categorize your expenses into the right accounts — so they're in perfect shape when you submit them to your accounting team.
Requirements
You need a Google account to sign in. This can be a Gmail address, a Google Workspace account, or any email linked to Google.
Google Workspace users: Just sign in — you're already set.
Don't have a Google account? Create one with your existing email at the Google Account Sign‑up page — choose "Use your existing email."
No — just sign in at https://www.expensebot.ai
The 60-day trial starts without a credit card. After that, ExpenseBot is $10 USD per seat each month or $100 USD per seat each year, with native pricing in CAD, EUR, GBP, and AUD. Accountants and bookkeepers can manage clients for free.
Your subscription covers current-year and ongoing scanning. Completed prior years are optional one-time unlocks: $20 for the last completed year or $79 for permanent Any-Year access. Annual billing includes the last completed year after the first annual payment.
No. The standard free trial starts without a card, so it cannot charge automatically. Your account becomes inactive unless you choose a subscription. Team checkouts can optionally collect a card for billing after the remaining trial; Stripe shows the billing date before you confirm.
Ready to get started?
Try ExpenseBot free for 60 days. See why thousands of businesses trust us with their expenses.
Start Free Trial →Solutions By Role
For Freelancers
- Super simple — just login, snap a photo, done
- No app to download — works in any browser with your Google account
- All receipts automatically appear in your Google Sheets
- Reports created in familiar spreadsheet format
- Import from PDFs, screenshots, or let our Gmail agent auto‑capture receipts
- One‑click sharing with your accountant — complete with all documentation
- AI organizes and categorizes expenses automatically
- Handles both expenses and invoices seamlessly
See how freelancers use ExpenseBot:
When a client hands you money upfront — for props, parking, ad spend, craft services — ExpenseBot tracks it as pass-through money, not income. Log the cash with the Credit toggle, tag every project expense with the same client, and the Open Balances widget on your Income tab shows the running net in real time. When the project wraps, tap Refund leftover to settle (or generate a Bill Client invoice if you spent more than they gave you).
90-second walkthrough — Maya's $500 shoot advance, settled in 4 clicks:
For Google Workspace Companies
Once invited, each member of your team can use ExpenseBot to capture and submit expenses under their own company domain. No separate accounts needed — your team simply logs in with their existing Google Workspace credentials.
See the complete workflow from purchase to approval:
Benefits for your organization:
- Team logs in with company domain — no separate accounts
- Create expense reports in your corporate Google Sheets
- Secure storage in your corporate Google Drive
- Gmail AI agent automatically captures receipt emails
- One‑click report sharing with finance team
- Built‑in Google Sheets collaboration features
- AI validates expenses against your corporate policy
- Simple license management and team assignments
- Per-employee receipt tracking and reporting
- Existing-card reconciliation and missing-receipt follow-up
For Accountants
- Eliminate client expense headaches
- Review and approve reports directly in browser
- Reports delivered in familiar spreadsheet format
- Export to ANY accounting software with AI G/L mapping
- Automatic invoice and expense separation
- Built‑in policy compliance validation
- Approved reports lock automatically to prevent tampering
See how accountants streamline expense management:
For CFO Consultants
- Save clients time and money across all departments
- Seamless ERP system integration
- Complete expense workflow with automatic report locking
- Works with all accounting packages, direct QuickBooks integration
- Delivers reports in familiar Google Sheets format
For Investment Managers
- AI‑powered expense compliance that reads your Form ADV
- Automatic fund vs. adviser allocation with SEC‑defensible citations
- Bulk invoice processing — handle hundreds of PDFs at once
- Auto‑retrieval of Form ADV directly from SEC database
- Vendor contract matching with renewal alerts
- One‑click push to QuickBooks or export to any accounting system
- Complete audit trail for SEC examinations
See how investment managers automate expense compliance:
For Real Estate Agents
- Simple mileage tracking for showings and appointments
- Gmail auto‑capture of MLS fees, staging invoices, photography bills
- Year‑end tax report with all deductions calculated
- Automatic business vs. personal expense separation
- Credit card reconciliation to catch missing receipts
- IRS‑compliant mileage log and expense documentation
- Import trips directly from Google Calendar
See how real estate agents track expenses and mileage:
For Wedding Planning & Personal Life Events
Yes — and we built a dedicated wedding flow that goes well beyond a single "Wedding" bucket. When you type a wedding description into the AI tag wizard (Settings → Manage Tags → ✨ Create a Tag with AI), it detects wedding intent and creates five tags at once:
- Wedding – Attire — gown, tux, alterations, hair, makeup, jewelry
- Wedding – Venue — venue rental, caterer, bar service, cake, rentals
- Wedding – Vendors — photographer, videographer, DJ, florist, officiant, planner
- Wedding – Stationery — invitations, save-the-dates, favors, gifts
- Wedding – Honeymoon — flights, hotels, resorts, excursions, rental car
Every future receipt sorts itself automatically. Existing receipts from the last 90 days are retroactively tagged too.
Tracking who paid: Add paidby:bride (or groom, bride's family, groom's family) to the subject line when forwarding a receipt. ExpenseBot stamps "Paid by Bride" into the Notes column — without touching the category tag, so your budget totals still roll up cleanly. Or add a second Gmail (bride@gmail.com) as a verified forwarding email under Settings → Forwarding Addresses (with a chip label like "Bride") and attribution is automatic — no subject-line typing needed.
Dedicated Wedding Budget Report: once you're tagged for wedding tracking, a specialized report appears on My Reports — budget vs actuals by vendor category, top vendors per tag, deposit/final-payment pairing, a monthly burn chart oriented around your wedding date, and a Paid-By split flagging who over- or under-paid vs the ratio you set (50/50, 60/40, etc.).
Generic reports: Go to My Reports → Create Report → Report by Tag and pick all five "Wedding –" tags for a per-category breakdown. Filter the Notes column in your spreadsheet to split costs by payer.
The same approach works for any life event: home renovation, baby expenses, moving costs, or an anniversary trip.
For Realtors & Real Estate Agents
Yes — and we built a dedicated realtor flow that maps cleanly to IRS Schedule C. When you type a realtor description into the AI tag wizard (Settings → Manage Tags → ✨ Create a Tag with AI), it detects real estate agent intent and creates five tags at once:
- Realtor – MLS — MLS fees, NAR/state dues, E&O insurance, license renewal, lockbox (Supra, ShowingTime)
- Realtor – Gifts — closing gifts, housewarming, thank-you cards (IRS $25/client/year limit applies)
- Realtor – Listings — staging, photography, drones, virtual tours, yard signs, open house supplies
- Realtor – CE — continuing education, designations, conferences, coaching, training books
- Realtor – Tech — CRM (Follow Up Boss, kvCORE), DocuSign, ShowingTime, Canva, scheduling apps
Every future receipt sorts itself automatically. Existing receipts from the last 90 days are retroactively tagged too.
Schedule C at tax time: each tag maps to a specific Schedule C line — MLS to lines 15 & 23 (Insurance, Taxes & licenses), Gifts to line 27a, Listings to line 8 (Advertising), CE to line 17 (Legal & professional), Tech to lines 18 & 22 (Office expense, Supplies).
Two specialized realtor reports with in-app previews: once you're tagged as a realtor, the Realtor Commission P&L and Realtor Gift Limit Checker appear on My Reports. Both run as a two-step preview — pick a tax year, click Preview, and see the answer inline (income/expense/net stat cards + per-bucket breakdown for the P&L; red chips for any client over the IRS §274(b) $25 cap for the Gift Checker). Click Generate to spawn a Google Sheet for your accountant. Year-end Schedule C / T2125 filing flows through the standard Year-End Tax Report, which covers your full expense set (insurance, rent, utilities, professional fees) beyond the realtor bundle.
Mileage stays in ExpenseBot's dedicated mileage tracker and maps to Schedule C Line 9 — no separate realtor mileage tag needed.
Yes. The Realtor Gift Limit Checker report audits your gift spending against IRS §274(b) and CRA limits and flags every recipient at risk of having gifts disallowed at audit.
- USA — IRS §274(b) caps deductions at $25 per recipient per tax year. Anything beyond is non-deductible.
- Canada — no hard cap, but gifts over $500 CAD per recipient trigger a "verify reasonableness" flag.
- Other countries — total-by-recipient breakdown without flagging.
How it flags: USA users see recipients sorted by year-to-date total — 🟢 under $25 fully deductible, 🟡 at limit, 🔴 over with the non-deductible excess broken out separately. Canadian users see the reasonableness flag at $500 CAD instead.
How it identifies the recipient: ExpenseBot checks four sources in order — (1) tag sub-name (Realtor – Gifts – Alice Johnson uses Alice Johnson), (2) Notes column (Paid for Alice or For: Alice), (3) merchant name as fallback (flagged with ?), (4) Unassigned. The easiest way to add a recipient is paidfor:Alice Johnson in the email subject when forwarding the receipt.
The report scans any tag whose name ends in Gifts — Realtor – Gifts, Client Gifts, Wedding – Gifts, or generic Gifts — and shows a "tags scanned" count up front so you can confirm your gift receipts are being included. Catches over-limit clients before your accountant does.
For Marketing, PR & Creative Agencies
Yes — ExpenseBot has a dedicated agency flow for marketing, PR, ad, and creative agencies that bill expenses back to named clients. The convention is simple: tag receipts with Client – <Name> (e.g., Client – Acme Corp, Client – Global Media). The AI tag wizard detects "agency" intent — type something like "ad spend for Acme Corp" or "Canva subscription for client work" and it creates the right Client – tag automatically. From then on, any receipt mentioning that client in the merchant, subject, or notes auto-tags to the right partition.
Agency Per-Client P&L report: once you have any Client – tag, the Agency Per-Client P&L report appears on My Reports. It runs as a two-step preview — pick a tax year, click Preview, and see income / expenses / net for the year, top losing clients (red), top earning clients (green), and any passthrough warnings (e.g. "Acme — paid $4,200 on your behalf, never rebilled"). Click Generate to spawn a Google Sheet for your accountant. Year-end taxes (Schedule C / T2125) flow through the standard Year-End Tax Report, which already maps the agency expense bundle to the right form lines.
Works for sole-prop agencies (Schedule C) and incorporated agencies (LLC/Inc with T2125 or separate corporate return). Receipts for your own overhead (software, office supplies, staff meals) stay in the normal expense categories — only client-specific spend gets the Client – tag, so your own P&L and each client P&L stay cleanly partitioned.
Turn any expense report into a clean, AP-friendly invoice in two clicks. Tag receipts to a project, trip, or client (e.g. Acme Rebrand, Trip – Berlin, Client – Acme), run a Report filtered by that tag and date range — your usual flow — then click Bill Client on the report card.
What you get: ExpenseBot generates a styled Google Doc invoice in your Drive with every receipt as a line item, a markup line (if you set one), totals, your business info, and a footer linking back to the supporting expense report. The Doc is your private working copy — tweak descriptions, add a thank-you note, anything you want before sending.
Send the right way — PDF only: Download the PDF and send it to your client (the traditional, audit-friendly way to invoice — immutable, exactly what corporate AP departments file), or use Save as Draft to stage a draft in your own Gmail with the PDF attached, addressed to your client. Send from your own address — no middleman, threads cleanly with your client's reply. The live Doc never leaves your Drive.
Set business info once: In Settings → Billing Profile, fill in your business name, address, tax/EIN/GST/VAT number (auto-labeled by country — USA: EIN, Canada: GST/HST, UK: VAT, Australia: ABN, etc.), and default payment terms (Net 30, Net 14, etc.). Every future invoice prefills from there. Optional — you can fill it in for invoice #1 if you'd rather, and we'll save it then.
Works for freelance designers, consultants, agencies billing back ad spend or passthrough, photographers billing travel and assistant fees — anyone tracking expenses against a tag, trip, or project. Tax treatment of reimbursable expenses depends on jurisdiction, so the v1 invoice intentionally has no tax line and includes a footer disclaimer — consult your accountant if your client requires VAT/GST/sales tax handling.
For Landlords & Rental Property Owners
Yes — ExpenseBot has a dedicated rental property flow for landlords. Go to Settings → Rental Properties and add each of your properties (nickname, street address, purchase date, rental %). ExpenseBot creates a tag for each one (Prop – Brooklyn duplex, Prop – Queens condo, etc.).
Auto-tagging: receipts that mention a property address in the subject or body auto-tag via deterministic street-number + street-name matching — no Gemini guessing, no false positives. If you have two properties on the same street (123 Main and 127 Main), the exact street number disambiguates. Rent deposits detected by our Gmail income scanner match the same way, so both sides of the per-property P&L come together automatically.
Schedule E report: run My Reports → Schedule E Rental and get a Google Sheet with IRS Schedule E line layout per property — Advertising, Cleaning & Maintenance, Insurance, Management Fees, Repairs, Taxes, Utilities, HOA/Condo Fees — plus manual-entry fields for mortgage interest (from your 1098) and depreciation.
House hack / owner-occupied: set Rental % to the portion actually rented (e.g., 50% for half a duplex). The report prorates shared expenses automatically.
Three new Expense Accounts (Cleaning and Maintenance, Property Management Fees, HOA and Condo Fees) are added to your spreadsheet on first property setup so nothing is ambiguous at tax time. Works for any portfolio size, from 1 property to 20+.
Yes. ExpenseBot tracks rental property expenses per property (not lumped as one "rental" category). Add each property in Settings → Rental Properties with an address and rental %, and receipts with that address auto-tag to the right property. At tax time, ExpenseBot generates Schedule E (US) or T776 (Canada) worksheets with one section per property, ready for filing. See /rental-property-tracker.
Yes. ExpenseBot generates T776 Statement of Real Estate Rentals worksheets for Canadian landlords, with gross rents on Line 8141, expenses mapped to Lines 8521 (advertising), 8690 (insurance), 8710 (interest), total expenses on Line 9369, and net income/loss on Line 9946. US landlords get Schedule E worksheets. One T776 per property, as CRA requires. See /rental-property-tracker.
The Rent Roll grid uses one glyph per property per month so you can spot shortfalls at a glance:
- ✓ green — full rent received (within 5% of expected, allowing for rounding and small late-fee deductions)
- ≈ amber — partial payment; the actual dollar amount appears under the glyph so you see "≈ 1500" at a glance
- ✗ red — no payment found and the property was active that month
- — grey — no payment expected (vacancy, untracked, or pre-activation)
Hover any cell to see received vs expected with the delta — e.g. CAD 2,367.00 received / 2,630.00 expected (-263.00). Multi-source rent (a tenant paying in two installments) is summed before comparison, so two $1,000 deposits read as a full ✓ for a $2,000 expected rent.
Set the Expected monthly rent at Settings → Rental Properties. Until you set a value, every received payment shows as ✓ because there's nothing to compare against — the property's status reads Untracked with a Set rent → link straight to the editor.
Three lines on Schedule E and two on T776 are left blank in the generated worksheet for you or your accountant to fill in. They aren't auto-routable from email because their source documents are year-end forms — not receipts.
USA — Schedule E (Form 1040)
- Line 12 — Mortgage interest paid to banks — from Form 1098 Box 1 (your lender mails or emails this in January/February).
- Line 13 — Other interest — non-mortgage interest (HELOC, second mortgage with a private lender). From the secondary lender's annual statement.
- Line 18 — Depreciation — from Form 4562, Line 22. Residential real estate is 27.5-year straight-line; commercial is 39-year. Most accountants calculate this once with you and you copy the figure into the worksheet each year.
Canada — T776 (Statement of Real Estate Rentals)
- Line 8710 — Interest — from your lender's annual interest statement.
- CCA — Area A — Capital Cost Allowance uses declining-balance, with the rate depending on the building's CCA class. Most accountants calculate this at year-end after deciding whether to claim CCA at all (claiming it can disqualify principal residence exemption later).
The worksheet has a row for each line with the label pre-filled and the Cost column blank — type the figure directly into the cell. The Total Expenses and Net Income/Loss formulas pick up your manual entry automatically. Each property in the report has its own set of these rows.
Yes. ExpenseBot is designed for office managers and personal assistants at small offices (3-20 people). Your team forwards receipts to a shared alias or lets Gmail auto-scan catch them, and you review everything in one Google Sheet. Export to QuickBooks, Xero, Sage, or Wave in one click. No IT setup required — any Google Workspace account can onboard in 10 minutes. See /office-manager.
For Executive Assistants
- Manage expense tracking for multiple executives from one account
- Set up executives with their own Gmail scanning and receipt forwarding
- Create and submit expense reports on behalf of executives
- Executives can sign in to review and approve their own reports
- Seamless handoff — you capture, they approve
As an executive assistant, you can add and manage multiple executives from your ExpenseBot account. Set up their email addresses, configure Gmail scanning, and start capturing their expenses immediately.
Once you invite an executive, they receive an email with instructions to sign in. Executives can then view their expenses, review reports you've prepared, and approve them — all without needing to capture receipts themselves.
Automated Receipt & Invoice Capture
Email Import
Forward a receipt email to receipts@expensebot.ai from your ExpenseBot email address or a registered forwarding address. ExpenseBot can read:
- Receipt details embedded directly in the email body
- Image attachments of receipts
- PDF attachments
- Word attachments (
.doc,.docx) - Excel attachments (
.xls,.xlsx)
It adds confirmed expenses to your spreadsheet and surfaces anything that needs a decision under View receipt activity on the home screen:
On the ExpenseBot home screen, select View receipt activity under Email a receipt. It has two tabs:
- Recent shows whether the receipt was added, already existed in your spreadsheet, was not added, is still processing, or will be retried.
- Needs attention shows only items where you can enter details or make a decision — not every duplicate or routine skip.
Activity cards can also show who forwarded the email, the merchant, and the amount. Your Expenses spreadsheet remains the final record of expenses that were added.
Yes. Forward the email to receipts@expensebot.ai. ExpenseBot can process Word (.doc, .docx) and Excel (.xls, .xlsx) attachments as well as PDF and image receipts.
If a document cannot be read safely or lacks enough transaction details, it appears under View receipt activity → Needs attention instead of being silently dropped, so you can complete it or mark it as not an expense.
It means ExpenseBot received the document but needs your decision before it can be treated as an expense. You can:
- Enter missing details to complete and save the expense
- Open receipt page if the receipt is behind a sign-in or download link
- Not an expense to dismiss quotes, unpaid documents, and other material you don't want recorded
Duplicates and routine skips do not appear there just because they weren't added.
For cash expenses or when you don't have a receipt, send an email to receipts@expensebot.ai with cash: at the start of the subject line, followed by the amount, description, and optionally a date.
Simple expenses:
cash: $45 Ubercash: $12.50 Starbucks coffeecash: $200 office supplies
With tax or tip:
cash: $1200 rent with $25 taxescash: $85 dinner with $12 tax and $15 tip
Tax and tip are included in your total — $1200 with $25 taxes means your total is $1200, not $1225.
With dates:
cash: $50 lunch yesterdaycash: $200 groceries last fridaycash: $1200 rent for marchcash: $1200 rent for march 1 2025
If you don't include a date, today's date is used.
Multiple expenses in one email:
cash: $50 lunch, $30 gas, $20 parkingcash: $12 coffee, $65 dinner, $25 Uber
Recurring expenses:
cash: $1200 rent each month this yearcash: $1200 rent and $25 taxes each month this yearcash: $1200 rent for the past 4 monthscash: $1200 rent for march, april, and maycash: $50 cleaning every week for the past month
Recurring expenses will never be created for future dates.
Each expense is automatically categorized by AI, tagged as "No Receipt", and added to your spreadsheet. You can put details in the subject line, the email body, or both.
Yes. Add it as a Forwarding Email in Settings. If most receipts arrive at the Gmail you signed up with, you can skip this.
If you receive an error like 550 5.7.520 Access denied, Your organization does not allow external forwarding, your company's Microsoft 365 admin has blocked external email forwarding as a security policy.
Solutions:
- Ask your IT admin to whitelist
receipts@expensebot.aias an allowed external forwarding destination - Forward from personal email — if you have a Gmail, forward receipts through that instead
- Upload directly — use ExpenseBot's camera, Google Photos import, or drag-and-drop upload
Your IT admin can find the setting in Microsoft 365 Admin Center → Exchange → Mail Flow → Remote Domains, or via PowerShell using Set-RemoteDomain.
Connect Gmail and let the AI find receipts automatically — no forwarding rules required:
Yes — connect up to 3 Gmail accounts (subscription feature), and the historical scan range applies independently per account. Subscription covers current-year and ongoing scanning for each connected account. Last completed year is a $20 one-time unlock. Permanent Any-Year access is $79 one time and lets you scan as many completed years as needed across all connected Gmail accounts, one year per scan. Annual billing includes last completed year after the first annual payment.
How it works:
- Go to Process from Gmail and connect each Gmail account
- Select an account from the dropdown
- Choose a time period from the year cards (subscription covers current year; one-time unlocks cover completed prior years)
- Click Scan — it runs in the background
- Repeat per account; each scan runs independently
- You'll receive an email notification when each scan is complete with a summary of processed receipts and those needing review
Scans process in the background so you can close the page. All receipts across all accounts land in the same master spreadsheet, dated by their original transaction date.
The scanner uses multiple layers to find your receipts automatically — no setup or rules needed:
- Keyword scanning: Every scan searches for emails containing "receipt", "order", "invoice", "payment", and more — from all senders.
- Learned senders: Once you process a receipt from a sender (e.g., Amazon, Adobe), the AI remembers and automatically includes them in future scans.
- AI classification: Every email found is analyzed by AI to confirm it's actually a receipt (not a marketing email or shipping notification).
You don't need to add senders or set up keyword rules — the more receipts you process, the smarter the scanner gets for your account. If something is still being missed, apply the "ExpenseBot" label to the email in Gmail and the scanner will pick it up and learn from it.
Pro tip: Gmail filters for guaranteed pickup
Want to make sure receipts from a specific merchant always get picked up? Use Gmail's built-in filters to auto-apply the "ExpenseBot" label to emails from that sender (e.g., auto-confirm@amazon.ie). The scanner will pick them up on every scan — no manual labeling needed.
How to set it up: In Gmail, click the search bar filter icon, enter the sender's email in "From", click Create filter, then choose Apply label "ExpenseBot".
Yes. Here's how the two scan types cover archived mail:
- Daily automated scans: Now pick up new receipts as they arrive — even ones a Gmail filter files or archives straight out of your inbox. They focus on recent mail, so older receipts you archived a while ago are best caught with a historical scan.
- Historical scans (when you first connect or run a manual "scan further back"): Search all mail — including archived emails and labeled folders — so receipts you've already read and filed away are still captured.
In both cases, once an email has been processed it's excluded from future scans — so nothing gets duplicated.
Sign in to ExpenseBot and click the "Scan Gmail for receipts & income" button on your home screen — it has the Gmail logo and sits just below "Take Photo of Receipt". You can also go straight to it with this direct link: Connect Gmail & start scanning.
Google will ask you to give ExpenseBot permission to find receipts in your Gmail — check all the permission boxes when asked.
As soon as you approve, ExpenseBot automatically scans your recent email history for receipts and income and adds them to your spreadsheet — and from then on it keeps itself up to date automatically.
For free, ExpenseBot scans the last 60 days when you first connect Gmail, and your nightly scans keep it current going forward.
- Last 60 days — free, automatic
- Current year — a subscription unlocks the current calendar year, run from the Gmail scan page
- Last completed year — a one-time $20 historical unlock, included with annual billing after the first annual payment
- Older history — one-time $79 permanent Any-Year access lets you scan as many completed years as needed across all connected Gmail accounts, one year at a time
It's all driven from the year cards on the Gmail scan page — pick the year you want and follow the prompt. Scans run in the background and you'll get an email when they finish.
It's rare — the scanner already searches for receipt-related keywords across all senders — but some emails can still be misclassified by the AI. For example, order confirmations with "not yet charged" disclaimers may be skipped. Here's what to do:
Two steps to fix it:
- Label the email: In Gmail, apply the "ExpenseBot" label to the missed email (the label should already be in your label list).
- Process it: In ExpenseBot, click Find receipts in Gmail — the labeled email will appear and you can process it right from there.
Processing a missed receipt teaches the AI to recognize that sender going forward — future emails from them will be included in scans automatically.
Please also let us know at support@expensebot.ai so we can investigate and improve the detection for everyone.
Yes. Exclusion rules let you skip specific merchants or expense categories during Gmail scans — matching receipts are never written to your spreadsheet.
How to set it up:
- Open Gmail Processor (the receipts/Gmail view).
- Click the Exclusions button in the top-right header.
- Choose Merchant or Category from the dropdown, enter the name, and click Add.
Matching behavior:
- Merchant rules — substring, case-insensitive. Adding "amazon" blocks "Amazon.com", "AMAZON MKTPLACE", and "Amazon Web Services".
- Category rules — exact match, case-insensitive. Adding "Meals and Entertainment" only blocks that exact category.
Excluded receipts are labeled ExpenseBot-Excluded in Gmail for a transparent audit trail. Your scan confirmation email shows exactly what was excluded and which rule matched. Nothing is deleted — the original email stays in your inbox.
Note: Exclusions only apply to Gmail scans. If you manually upload a photo or PDF receipt, it always goes through — deliberate uploads reflect explicit intent.
Yes. By default ExpenseBot scans your inbox, but you can point it at specific Gmail labels instead — handy if a filter auto-files your receipts into a Receipts folder, or you just want a busy inbox left alone.
How to set it up:
- Open your Gmail scanning settings (the Smart Scanning card).
- Under "Where should we look for receipts?", click "+ Add folder" and pick a Gmail label (up to 10).
- To scan only those folders, uncheck Inbox — you'll see a reminder that receipts landing anywhere else won't be found.
Good news: your daily scan now picks up new receipts wherever they land — including ones a Gmail filter files or archives out of your inbox — so you usually don't need to add anything here. This setting is for when you want to narrow the scan to specific labels (or scan only those folders and skip the inbox). Historical "catch-up" scans search all your mail (every label, folder, and archived message), so they find older receipts wherever they sit — unless you've unchecked Inbox to scan specific folders only, in which case catch-up scans stay limited to those folders too. If you remove your last folder while the inbox is off, the inbox turns back on automatically — so you're never scanning nothing.
Receipts that skip your inbox:
If a Gmail filter auto-labels and archives your receipts so they never reach the inbox, the daily scan now picks them up automatically going forward — no setup needed. To backfill ones that were filed away in the past, run a historical scan (it searches all your mail). You can still add the label here if you'd like to be explicit about it.
Most people leave Inbox checked and let ExpenseBot find receipts wherever they land. Use this only when you want to narrow the scan to a specific label.
Photo Import
ExpenseBot makes it easy to find and import receipts directly from Google Photos:
If you have screenshots, saved images, or other receipt photos stored directly on your device (not in Google Photos), you can import multiple images at once:
Document Import
Yes! Click the Google Drive button in ExpenseBot to open the Drive Picker. Browse or search your Drive, select up to 300 receipt files at once (100 on the free trial), and AI processes them all automatically.
Privacy note:
ExpenseBot only accesses the specific files you select — it uses Google's secure drive.file scope, not full Drive access. Your other Drive files are never touched.
Open expensebot.ai in Safari on your iPhone, sign in with Google or Apple, and tap Upload. Safari opens iOS's native photo picker.
- Long-press the first receipt photo in your camera roll
- Tap additional photos to multi-select (up to ~100 per batch)
- Tap Upload — AI processes every image in parallel
- Each receipt becomes a row in your Google Sheet with vendor, amount, date, tax, and category extracted
No app download needed:
ExpenseBot runs entirely in Safari. iCloud Photos appear in the picker automatically because iOS syncs them to the camera roll. For a native-app feel, use Safari's "Add to Home Screen" — you get a home-screen icon and full-screen UX without the App Store.
Learn more: iPhone Receipt Scanner
ExpenseBot ships a free "Scan Receipts" Apple Shortcut. Install it in under 2 minutes:
- Download the Shortcut from the Apple Shortcuts setup page → tap Add Shortcut
- Run it once — the first time only, it asks for your personal upload URL. Copy it from Settings → Integrations → iPhone Shortcut and paste it. Saved automatically.
- Open Photos.app, select receipt photos, tap Share → "Scan Receipts"
- Photos upload in one tap; results appear in your Google Sheet in ~2 minutes
Works on iPhone + Mac + iPad:
Any device running Shortcuts (iOS 14+, iPadOS 14+, macOS Monterey+). Download and install once — the Shortcut syncs to all your Apple devices automatically.
Photos and images only: JPEG, PNG, HEIC, WebP (up to 15 MB each). If a photo was offloaded to iCloud, the Shortcut downloads it first automatically. For PDF receipts, use the in-app upload button. Also triggerable via Siri ("Hey Siri, Scan Receipts").
Yes — every ExpenseBot report has a one-click "ZIP (Receipts)" download alongside CSV / XLSX / PDF. Available on HUD Medical, CRA Medical, HSA/FSA, PHSP, and regular expense reports.
The ZIP contains:
- Every Drive-linked receipt PDF, numbered and dated:
001_2026-02-14_Shoppers_Drug_Mart_47.99.pdf index.csv— maps every filename to date / vendor / amount / expense-type / notes with per-row success/fail statusREADME.txt— admin-specific upload instructions for your HSA/FSA provider (WageWorks, HealthEquity, FSAFEDS, Optum, Lively, Fidelity; Olympia Benefits, Benecaid, myHSA, Simply Benefits for Canada)
Technical guarantees:
Streams from Drive → browser without buffering — 100+ MB bundles work fine. If a receipt was deleted from Drive, it's marked FAILED in index.csv and the rest of the ZIP completes (never all-or-nothing).
Enter eligible expense totals on Line 33099 (self, spouse, minor children) and Line 33199 (adult dependents you supported) of your T1 return.
- Threshold = LESSER of 3% of net income or the annual indexed cap — $2,890 for the 2026 tax year ($2,834 for 2025)
- Pick any 12-month period ending in the tax year — not just the calendar year
- Keep receipts for 6 years (CRA doesn't want them attached, but can request during review)
ExpenseBot automates this:
Scans Gmail for 24 months of medical receipts, extracts vendor/date/amount/tax/line items from each, classifies by CRA expense type. Wizard at /my-cra-medical-report lets you pick any 12-month window with live threshold math. Generates T1-supporting documentation. Patient-name splitting for Line 33099 vs 33199 is manual today (auto-split ships in V2). Stores receipts in your own Google Drive for the full 6-year CRA retention.
Full guide: The Complete CRA Medical Expense Tax Credit Guide. Landing page: CRA Medical Expense Tax Credit Tracker.
Yes! ExpenseBot checks your spreadsheet before adding any receipt. It will only flag something as a duplicate if the same receipt is already in your spreadsheet. So if receipts didn't go through the first time and you resubmit them, they'll be processed normally — no duplicate issue.
ExpenseBot processes Amazon order confirmations from auto-confirm@amazon.* (any country marketplace — .com, .ca, .co.uk, .de, .fr, .co.jp, etc.). The order confirmation is Amazon's receipt — Amazon doesn't send a separate one. We parse the plain-text body directly to extract items, total, tax, and order number, then drop the row into your spreadsheet. Works across 20+ Amazon marketplaces.
Amazon's status emails are skipped on purpose:
shipment-tracking@amazon.*("Shipped: …") — status update, not a charge.order-update@amazon.*("Delivered: …") — status update, not a charge.return@amazon.*(refunds, returns) — we don't yet match refunds back to the original purchase.
Scanning those would create a duplicate row for every order, so we filter them out. If you see Amazon emails in Gmail but no Amazon rows in your spreadsheet, the most common reason is simply that you haven't placed a new Amazon order since signing up — your next order confirmation will be captured automatically. Subscribers can also use the "Scan older" option on the Gmail scan button to sweep historical orders from prior years.
Yes, we handle currency from any country and convert it back to your home currency using the exchange rate from the date of the receipt itself.
Splitting Expenses
One original payment divided into two or more allocation lines so each part can be categorized and reported correctly. It stays one payment with one receipt.
No. ExpenseBot keeps one parent payment and one receipt. The allocation lines sit beneath it and always add up to the original total.
Yes. The personal part is recorded as an explicit non-business allocation — it's kept, not deleted — so your records stay complete while only the business part is claimable.
Yes, using categories you've already set up in your Expense Accounts. Example: a $150 hardware receipt as $110 Repairs and maintenance and $40 Small tools.
Not in this version. One Tag applies to the whole transaction, and every allocation line inherits it.
Use Business % when the same mix applies to a whole category every time (a recurring default). Use a split for one transaction that's different or contains several categories.
No. Once you split a transaction explicitly, that split is authoritative for it — ExpenseBot won't re-apply the category's percentage on top. For example, a $100 internet bill you split $75/$25 uses $75 as the business amount, not 60% of $75.
Save stays disabled until they balance. Apply remainder assigns the exact difference so your cents always match the receipt.
Nothing — they're snapshots and stay as they were. Newly generated reports use your current split.
Not in this version. Report inclusion is set at the parent transaction, so all of a payment's allocation lines travel to the same report together.
It reversibly removes the transaction from future report projections without deleting its row or receipt. You can restore it any time. This is different from marking part of a payment Personal — Exclude sets aside a whole transaction from reporting.
The transaction's total changed, or one allocation's category is no longer valid. Rebalance the lines or pick a configured category before using it in affected reports or exports.
Yes. Enter the allocation amounts as positive figures — ExpenseBot preserves the parent transaction's refund sign.
Anyone with an active free trial or a paid (or paid-equivalent) ExpenseBot account. Access is checked on the server.
Yes for QuickBooks Online, Xero, and Wave, and for supported generic/CSV exports. ExpenseBot keeps one parent transaction and sends its allocation categories as multiple lines, with the receipt attached or referenced once — the allocation lines are not separate card or bank charges, and they don't get separate receipt copies.
FreeAgent direct paid Expense/Bill pushes are blocked for split parents, because its current API shape can't safely preserve the split. Use a supported generic CSV or another supported direct destination instead.
Reports you've already generated stay as snapshots — after you change a split, create a new report so the export reflects it.
Viewing & Editing Your Expenses
All your expenses are automatically organized in a Google Sheet stored in your own Google Drive. This means you own your data, can edit it anytime, and can share it with anyone using familiar spreadsheet tools.
Benefits of Google Sheets:
- Full control: Edit, sort, filter, and customize your expense data
- Familiar format: Works just like Excel — no learning curve
- Easy sharing: Share with your accountant using Google's built-in sharing
- Your data: Stored in YOUR Google Drive, not on vendor servers
Your expenses live in a Google Sheet. To view and edit on your phone, we recommend installing the free Google Sheets app:
Install Google Sheets:
- iPhone/iPad: Download from App Store
- Android: Download from Google Play
Troubleshooting "View Only" or Can't Edit:
- Check your Google account: Make sure you're signed into the Google Sheets app with the same Google account you use for ExpenseBot
- Reinstall the app: If issues persist, uninstall and reinstall Google Sheets
- Try the browser: Open the spreadsheet link in Safari/Chrome if the app isn't working
Once installed, tapping "View Spreadsheet" in ExpenseBot will open your expenses directly in the Google Sheets app for easy editing.
Yes, you can view and make basic edits in your mobile browser (Safari/Chrome), but the experience is optimized for the Google Sheets app. For the best mobile editing experience, we recommend installing the free Google Sheets app. On desktop, the spreadsheet opens directly in your browser — no app needed.
No — once your data is in the sheet, changing categories, tags, totals, or any other field does not affect previously generated reports. Reports are created as a separate snapshot, so feel free to recategorize or update entries anytime.
Adding new categories or tags not in the dropdown:
- In ExpenseBot: Go to Settings > Category or Settings > Tag and add it there
- Shortcut in the spreadsheet: Go to the Categories or Tags tab and add your entry following the same format as the existing ones
Once added, the new option will appear in the dropdown for all future expenses.
That lighter grey text is intentional — not a glitch. Grey rows are expenses that have already been added to a report (via Create Report). When you create a report, ExpenseBot greys those rows and stamps the date in the Submit Date column (column W, on the far right).
The grey is a visual cue so you can tell at a glance what's already in a report versus what's still outstanding and available to report.
Is it safe to change the colour? Yes — editing the text colour won't break anything. Just note that ExpenseBot may re-apply the grey the next time reports are generated, and those rows stay marked as already-reported regardless of colour. The Submit Date in column W is the reliable record of what's been reported.
Mileage Tracking
ExpenseBot integrates with Google Maps to auto‑calculate distances. Enter your starting address and destination, toggle round‑trip if needed, and add it to your expense report with one click. The current IRS mileage rate is applied automatically to calculate your tax deduction.
Mileage tracking features:
- Google Maps integration: Auto-complete addresses and accurate distance calculation
- Round-trip toggle: One click to double mileage for return journeys
- Trip duplication: Reuse frequent routes with one click
- IRS-compliant log: Date, destination, purpose, and miles — everything the IRS requires
- Automatic rate updates: Always uses the current IRS standard mileage rate
The average business driver logs 10,000+ miles per year. At the current IRS rate, that's over $6,700 in tax deductions. ExpenseBot makes sure you capture every mile without a separate mileage tracking app draining your battery.
The IRS standard business mileage rate is 76 cents per mile for miles driven on or after July 1, 2026 (IRS Announcement 2026-11); miles driven January 1 - June 30, 2026 use 72.5 cents (Notice 2026-10). This applies to self-employed workers, freelancers, Uber and rideshare drivers, real estate agents, and anyone driving for business purposes. The deduction goes on Schedule C Line 9 (Car and truck expenses).
The medical and moving rate is 23.5 cents per mile from July 1, 2026 (20.5 cents for January 1 – June 30); the charitable rate remains 14 cents per mile all year. ExpenseBot always uses the current IRS rate when calculating your mileage deduction automatically.
Not if you drive for Uber, UberEats, DoorDash, Instacart, or similar gig platforms. Your Uber driver CSV already records the actual route distance for every completed trip — more accurate than GPS estimation. Upload your Uber CSV to ExpenseBot and an IRS-compliant mileage log is built automatically.
For driving that isn't captured in a platform CSV (client visits, property showings, errands), the built-in mileage tracker records individual trips with Google Maps integration — no battery-draining background GPS app required.
Yes! If your calendar events have addresses (like client meetings, property showings, or job sites), ExpenseBot can import them and calculate mileage automatically. This is the easiest way to capture business miles you might otherwise forget.
Perfect for professionals with location-based appointments:
- Real estate agents: Import showings, open houses, and client meetings
- Field service technicians: Import job site visits and service calls
- Sales representatives: Import client visits and prospect meetings
- Consultants: Import on-site client engagements
- Healthcare workers: Import home visits and facility rounds
Simply connect your Google Calendar, select the events with addresses, and ExpenseBot calculates the mileage for each trip. No more forgetting to log miles after a busy day of appointments.
Report Creation & Submission
Creating Reports
In the Report Wizard, choose "Report by Date Range" and select a start and end date. Your expenses are automatically summarized by category in a separate tab — no extra steps needed:
Use tags to group expenses, then choose "Report by Tag" in the Report Wizard:
Open My Reports → Insights → Spending Breakdown. It shows your spending two ways: by category (groceries, utilities, software…) and by merchant (how much you spent at Amazon, Costco, etc. — variants like "Amazon.com" and "Amazon UK" are merged into one line).
Pick a date range, optionally filter to specific merchants, and click Preview to see the totals — then Generate for a clean spreadsheet. Totals are net of refunds and exclude transfers and bill payments, so you see real spending. It's free.
Don't see it? Switch to Personal mode in Settings — the Spending Breakdown is built for personal/household tracking.
A category is the type of spending — groceries, utilities, software, travel. A merchant is who you paid — Amazon, Costco, Shell. Amazon sells across many categories, so your Amazon spending naturally spreads across several of them.
That's why the Spending Breakdown gives you both views: "by category" answers what you spend on, and "by merchant" answers where your money goes — including a single "Amazon" line totalling everything you spent there.
Reconciling Your Expenses
Where to find it: My Reports → Review expenses → Match card activity. If ExpenseBot's latest card check found unresolved refunds or credits, you'll see a Credits & Refunds (N) button — open it to review each item (date, description, amount, institution, card ending).
For each item you choose: Add to Spreadsheet for a real merchant refund, card reward, or statement credit — ExpenseBot records it as a negative expense so it offsets the original spending — or Ignore for card payments and transfers. Ignore decisions are remembered, so the same transaction won't reappear.
Nothing is added automatically. Obvious card payments, account transfers, and loan payments are filtered out; ambiguous credits stay reviewable — you're always the final decision-maker. Pending transactions appear after they post. Requires a paid plan with a connected bank or credit card.
No. Credits and refunds go to a review list where you choose Add to Spreadsheet or Ignore for each item — this prevents credit-card payments and account transfers from being recorded as merchant refunds. ExpenseBot pre-filters the obvious payments, transfers, and loan payments, and leaves ambiguous credits for you to decide.
Will ExpenseBot tell me when expenses or income are missing from my sheet?
Yes. With a bank or credit card connected via Plaid, ExpenseBot re-checks your transactions every week and emails you only when something is missing:
- Card charges with no matching expense in your spreadsheet
- Bank deposits with no matching income in your income tab
- Refunds and statement credits that should offset an earlier expense
Each flagged item is a one-click Add to Spreadsheet or Ignore. Card payments and transfers between your own accounts are filtered automatically, and ignore decisions are remembered — nothing lands in your sheet without your click.
Where to find it: My Reports → click Review expenses → click Match card activity. Reconciliation lives on the expense side — if you opened the income-side Plaid screen first, you'll only see bank account options there (that screen is for income detection, not card matching).
Inside that flow you have two options: connect via Plaid (automatic, ongoing) or upload your CC statement manually as PDF or CSV. Uploads work one statement at a time, month by month — no bulk upload, but no cap on how many months you can do sequentially. Good for historical cleanup: download last year's statements from your bank's website and work through them.
What about bank (chequing) statements?
Bank statement CSVs work too, in two halves. Upload under Match card activity for the spending side — only debits count as spending, and receipt-less payments like rent or direct debits will show as unmatched, which is normal (add or ignore each in a click). Upload the same file under Add Income → Log Income → From CSV for the deposits — transfers between your own accounts are skipped and existing income is deduped. Credit card statements give the cleanest matching results. For ongoing automatic income reconciliation, connect your bank via Plaid (pulls deposits on a weekly schedule).
For historical years, use the Year-End Tax Report (My Reports → Year-End Tax Report) — with Plaid connected, it pulls a full tax year's bank transactions for any previous year you pick. Plaid history depth depends on your bank, typically 18–24 months.
What reconciliation does:
- Automatic matching: Cross-checks your scanned receipts against your actual card charges
- Find missing expenses: Surfaces charges that don't have a matching receipt so you can decide what to do with each one
- "Never flag again": Mark recurring stuff (subscriptions, autopay) so it stops surfacing — also doubles as a "what am I paying for monthly" inventory
- Home office deductions: Track utilities, internet, and rent payments automatically
- Year-end confidence: Know you haven't missed any tax deductions
Bank connections are secured through Plaid, the same technology used by major financial apps. ExpenseBot never sees your login credentials. You can also upload PDF statements manually if you prefer not to connect directly.
Manual reconciliation (PDF/CSV upload):
Upload your statement in a transaction-level format: CSV, OFX, QFX, MT940, or CAMT. Most cards offer a CSV download from their online portal under Statements or Transaction History; many US banks also offer OFX/QFX.
The AMEX "Year-End Summary" PDF won't work
That document shows spending by category (Airlines: $X, Restaurants: $Y) with no individual transactions, so there's nothing to reconcile against.
Instead go to amex.com → Statements & Activity → Download → "Spreadsheet", pick any date range — you can grab all 12 months in one download — and upload that CSV. It includes every individual transaction.
Monthly CSVs also work — just upload one per month. One gotcha: a monthly statement PDF goes through the receipt-photo scanner, which is a different feature from credit card reconcile. Reconcile needs the CSV/OFX/QFX transaction file.
When you upload a credit card statement, refunds and credits are pulled into a separate Credits & Refunds tab — they're never added as new expenses. A credit is money the merchant put back on your card (a refund, return, chargeback, or billing correction), and ExpenseBot detects these automatically.
For each genuine merchant refund (e.g. "DELTA AIR LINES refund $312") you can match it against the original expense in your sheet to zero it out, or dismiss it. Internal card payments — autopay and statement payments — are filtered out automatically and never shown.
Duplicates are handled too: if the same charge appears in two monthly statements (a Dec 31 charge posting in both December and January), ExpenseBot matches on merchant + amount + date within ±1 day and suppresses the duplicate.
Fee & Interest Detection
Yes — the Fee & Interest Detector automatically scans your linked bank accounts for hidden charges and notifies you when they appear or increase. It uses your existing Plaid bank connection — no new setup required.
What it detects:
- Interest charges — credit card interest and cash advance interest (usually the largest bucket)
- Overdraft fees — charged when your account goes below zero
- NSF / returned-payment fees — bounced payments
- Foreign transaction fees — purchases in a foreign currency
- Out-of-network ATM fees — ATM use outside your bank's network
- Other bank fees — annual card fees, maintenance, late fees, wire transfers
ExpenseBot scans once a month and sends an Activity Center notification (plus push notification on mobile) when fees are detected or rise materially. The first time fees are found, you also receive a discovery email the following morning with the full category breakdown.
View your fee summary any time at expensebot.ai/my-fee-audit-report.
Subscription Tracking
Yes — the Subscription Auditor scans your expense sheet for recurring charges and surfaces your full subscription picture: what you're paying, how often, and whether any price has changed.
What the view shows:
- Total cards — active subscription count, monthly burn, annual burn
- Top-3 callout — your biggest 3 by $/mo with their share of total subscription spend (highest-leverage cancellation candidates)
- Active subscriptions list — each row shows merchant, cadence, charge count, "subscribed since" date, last charge date, lifetime total paid, monthly cost, and category tag
- Dormant chip — amber "No charge Nd" chip on rows that haven't charged in 60+ days (likely already cancelled or in a trial gap)
- Price increases — old → new amount, percent change, and annual impact, named per item
- Duplicate services — pairs that serve the same purpose, with a one-line reason
- Trial conversions — recently-started recurring charges with first charge date and amount
- Annual charges broken down — divided by 12 so you can compare all costs side by side
No bank connection required — it works entirely from the expenses already in your ExpenseBot spreadsheet. Run it from Settings → Specialized Reports → Subscription Auditor, from the Suggested Reports card on My Reports (appears once 2+ subscriptions are detected), or go directly to expensebot.ai/my-subscription-audit-report.
After your first scan, ExpenseBot monitors your expenses once a month and sends an Activity Center notification (plus push notification on mobile) if a new subscription appears or a price increases — you only hear about it when something actually changed.
Yes. After your first Subscription Auditor scan, ExpenseBot automatically re-scans your expenses once a month. If any subscription's price has increased — or a new recurring charge appears — you'll get:
- An Activity Center notification (bell icon, top right)
- A push notification on mobile if you have notifications enabled
Nothing is sent when there's no change — only when there's a real delta worth knowing about. You can also trigger a manual scan any time from Settings → Specialized Reports → Subscription Auditor.
Not exactly. Ramp is a corporate spend-management platform for companies that need to issue cards, enforce spend policies, and automate AP. ExpenseBot is a Google-native financial workflow for freelancers, accountants, and small teams that want Gmail receipt capture, existing card reconciliation, income tracking, P&L, and tax-ready records in Google Sheets. They solve different problems — ExpenseBot works alongside whatever bank and card program you already have.
Yes. ExpenseBot is designed for businesses that already have their own cards and bank accounts. Upload a CSV export from any bank or card provider and ExpenseBot matches transactions to captured Gmail receipts automatically. No bank credentials, no card switch required — keep your Chase, Amex, Barclays, RBC, or any other card program.
Companies that need to issue corporate cards to employees, enforce spend policies, run AP automation, manage procurement workflows, and have a dedicated finance team or CFO. Ramp is purpose-built for CFO-led companies with formal spend-management operations.
Cash Radar is the feature; Pulse by ExpenseBot is the personalized weekly email it delivers (currently in Beta). Cash Radar scans receipts, supplier invoices, and income notifications ExpenseBot already captures from your Gmail, then sends Pulse — a plain-English weekly business update — when there is enough useful signal to report:
- Bills due soon — unpaid supplier invoices with vendor name, due date, and amount
- Expected or recent income — income and payment notifications, plus recurring income patterns
- Known cash need — confirmed bills due minus strong income signals (not a bank-balance forecast)
- Needs review — items with a missing due date, unclear invoice direction, or uncertain amount
It is an email report, not another dashboard to maintain. ExpenseBot should skip the email when there is not enough useful signal, so the first Cash Radar a user receives is worth reading.
Cash Radar is a cash-flow heads-up based on documents ExpenseBot can see — not a full projected bank-balance forecast. It shows known bills due soon, income signals, and review items, separated so you know what ExpenseBot found versus what still needs attention. Review items are excluded from the cash picture until confirmed.
No manual forecast spreadsheet is required. Cash Radar is readiness-gated: ExpenseBot sends it only after there is enough useful signal from captured supplier invoices, income notifications, recurring patterns, or review items.
P/L reports are historical — they explain what happened last month. Cash Radar is forward-looking: it shows upcoming bills due, expected income signals, and items needing review before month-end. Use Cash Radar for weekly cash awareness; use P/L for monthly or quarterly business results.
Yes — as a lightweight receivables view. When you create a client invoice from an expense report using Bill Client, ExpenseBot records it as an open receivable (money expected), separate from received income, with a status of Open, Paid, Overdue, or Review. The invoice stays linked to its report.
Cash Radar counts open client invoices as expected cash-in alongside supplier bills due — so you see both what you owe and what you're owed — but never as income already received. Your income tracking stays the source of truth for money that has actually arrived. This is built from invoices you create in ExpenseBot, not full accounts-receivable accounting; QuickBooks AR export is not part of it yet.
A one-click checkup inside ExpenseBot that scans your income, expenses, receipts, tags, reconciliation, and subscriptions for the month, then surfaces a short to-do list — each item with one direct action. It is not a chatbot and not generic advice; it reads your actual spreadsheet totals and current settings. Find it in Settings (Priority card #1) or My Reports → Insights.
Seven checks run automatically: setup completion, income vs expenses balance, missing receipts, pending tag suggestions, P&L readiness, subscription review, and creator/platform income detection. Each finding includes the evidence and exactly one action button.
No. ExpenseBot uses your spreadsheet totals and existing settings to surface actionable bookkeeping items — missing receipts, income gaps, tag suggestions, subscription changes. It does not provide tax or financial advice. For tax questions, consult a qualified accountant or tax professional.
Yes. ExpenseBot publishes two Model Context Protocol (MCP) servers on npm — a read-only docs server and an authenticated server with 44 tools across search, capture, Gmail scan, reports, and analytics. They work with Claude Desktop, Cursor, Continue, paid ChatGPT, and any MCP-compatible client.
Setup is three minutes: generate a personal access token in Settings → AI Assistant Tokens, paste a JSON config block into your Claude Desktop config, restart Claude. From then on you can ask things like "find every Uber receipt I expensed last quarter" or "submit this photo as a $42 client lunch yesterday" in plain English.
Listed on the official MCP Registry. Learn more and install the ExpenseBot MCP server →
Sharing Reports
Review & Approval
When you receive access to a report, here's what you can do:
Once a report is approved in ExpenseBot, it becomes read‑only and locked in your Google Drive. This ensures compliance and preserves a secure audit trail for your finance team.
Expense Management & Organization
No — you don't have to start over. In Settings → Manage Expense Categories, rename your categories to your employer's coded names (like 8103-1900 - Meals). When you save a rename, ExpenseBot offers to update your past expenses to the new name too — you see exactly how many expenses will change before anything happens, it updates your main sheet only (reports you've already created stay unchanged), and you can undo right after.
Then create a date-range report in My Reports: the Summary page totals your spending by category — which are now your employer's codes. That's the coded summary your employer, treasurer, or grant funder is asking for. See the full walkthrough on creating an expense report with employer GL codes.
Renaming a category changes how future receipts are classified immediately. Your past receipts keep their old category name until you update them — and when you rename a category, ExpenseBot offers to update those past expenses at the same time. You'll see the exact count and total first, it changes your main expense sheet only (already-generated reports are snapshots and stay exactly as they were), and there's an Undo right after. Several old categories can map to one new coded category if you need that.
Tags let you group expenses by business trip, client, or project so you can create separate reports:
Yes. ExpenseBot scans your Google Calendar (past 90 days plus next 90 days) and proposes tags for recurring clients, projects, and trips. Built for anyone with recurring client meetings, scheduled gigs, or trips — chefs, photographers, consultants, agencies, freelancers, contractors.
Three ways to launch the wizard
- Tag Management modal → "Create tags from your calendar" button
- Suggested Reports card on My Reports (for freelancer/agency/realtor users)
- Automation Hub card in Settings → Gmail Automation
Or navigate directly to /my-calendar-to-tags-wizard.
What it proposes:
- Recurring meetings with the same attendee →
Client – Acme Corp - Distinctive upcoming events (wedding, shoot, launch, renovation, gala) →
Project – Smith Wedding - Travel-shaped events (trip, conference, expo, summit, festival, show) →
Trip – Toronto Food Show - Recurring same-location events →
Location – Starbucks Downtown
Multi-calendar supported — pick which calendars to scan in Step 1. Selection is shared with the Calendar → Mileage feature so you only configure it once.
Optional: filter by event color
If your work and personal events live on the SAME calendar, color-code your work events in Google Calendar (right-click event → "Set color") and use the Filter by event color picker in Step 1. The wizard will only consider events with those colors and skip everything else. Useful for mixed-use calendars or for scanning one client's color at a time.
Note: Apple Calendar's per-event coloring isn't standardized in CalDAV, so this filter is Google-only.
5-tier trust hierarchy when receipts arrive:
- Subject command (silent, ≥0.95) —
for:Acmeorproject:Website-Redesignin the receipt subject overrides everything - Attendee + same-day + plausible merchant (silent, ≥0.95) — receipt date matches a calendar event with the bound attendee
- Location match (silent, ≥0.95) — merchant location matches the bound event location
- Proximity to upcoming project (yellow suggestion chip, 0.7–0.95) — generic merchant near a single upcoming Project/Trip binding
- Multiple plausible bindings (inline dropdown, 0.5–0.7) — you pick
A merchant-class gate prevents false positives — a Best Buy laptop won't auto-tag to a "Lunch with Acme" event, hardware stores can't auto-tag to catering projects, etc.
Recently auto-tagged panel + undo
Silent auto-tags surface in a "Recently auto-tagged" panel above View Expenses with one-click Undo for 7 days. Click any chip to see the reasoning ("Tagged because: meeting at 2pm with john@acme.com on receipt date"). Suggestions also appear in your bell-icon Activity Center with push notifications.
Rolling 30-day sweep: once a day, ExpenseBot scans the next 30 days of your calendar for new patterns and creates bindings automatically — so as your calendar fills with future gigs, tags appear without you having to re-run the wizard.
Privacy: only event metadata (titles, attendees, locations) is sent to Google Gemini for clustering. Private notes, descriptions, and attachments are never read. Disclosed on Step 1 of the wizard before you continue.
Toggle off: turn off "Auto-tag from calendar" in Tag Management → Calendar Bindings (or in the Automation Hub). Existing bindings stay; new receipts won't auto-apply, but you can still tag manually or via subject commands.
Different from Calendar → Mileage: the older mileage feature uses event addresses to compute drive distance for IRS/CRA mileage deductions. Calendar → Tags reads event metadata for tag attribution. Both share the same calendar connection but live in different panels — they're complementary.
The wizard plugs into Google Calendar only — Apple doesn't expose a public REST API for iCloud Calendar. But you don't need the wizard to get the same per-gig auto-tagging value. Two universal paths work without any calendar integration:
Path 1 — Manual tags + subject commands (recommended)
Create your gig tags once in Tag Management — about 30 sec each:
Client – Acme Corpfor recurring client workProject – Smith Wedding Cateringfor one-off projectsTrip – Toronto Food Showfor travel events
When you forward a receipt to receipts@expensebot.ai, add a subject command:
for: smith wedding→ matches Project – Smith Wedding Cateringproject: catering acme→ matches existing project tagfor: acme→ matches Client – Acme Corp
Fuzzy matching handles partial names. ExpenseBot tags the receipt automatically — same outcome as the calendar wizard would have produced.
Path 2 — Use a separate Google Calendar for gigs
If you want full automation without subject-command discipline, create a free Google calendar called "Gigs" and put work events there — keep your personal life on iCloud. Then run the Calendar to Tags wizard against the new Google calendar. Best of both worlds.
Why we don't support Apple Calendar directly: Apple's authentication only exposes name + email, not calendar access. The only programmatic path is CalDAV with an app-specific password — a 5-step user setup versus Google's one-click OAuth. We've researched and planned the integration but it's deferred until adoption signal warrants. Reply to your trial or subscription email if you'd find direct Apple Calendar support valuable.
Color-coding tip: if you eventually move your gigs to a Google calendar, the wizard supports an optional "Filter by event color" step — scan only events you've colored a specific way (e.g. only Tomato red events). Apple's per-event coloring isn't standardized in CalDAV so this feature is Google-only.
ExpenseBot automatically determines the correct expense category account. Here's how you can customize them:
This is common with merchants like Apple, Amazon, or Google where one merchant sells everything from games to business software to personal subscriptions. For example, dozens of "Apple" charges might all be categorized the same way — but they include mobile games, iCloud storage, streaming subscriptions, and dating apps.
The fix: Add custom categories with descriptions
Go to Settings > Manage Categories and create categories that reflect how you actually want to organize your spending. The key is the description — this tells the AI exactly when to use each category.
Example: Breaking up Apple charges
- Games — "Mobile games, in-app purchases, gaming subscriptions"
- Software and Apps — "Business-related software, cloud storage, app subscriptions"
- Personal — "Dating apps, personal purchases, entertainment, non-business items"
Now a Puzzles and Conquest purchase gets filed under "Games," an iCloud subscription goes to "Software and Apps," and a Match.com charge goes to "Personal."
How does the AI decide?
ExpenseBot reads the actual content of the receipt — not just the merchant name. It looks at line items, subscription names, and purchase descriptions to understand what was bought. This information also flows into the Notes field as a brief summary (e.g., "Puzzles and Conquest" or "iCloud 200GB"), which helps you see at a glance what each charge was for.
Tips for good category descriptions
Be specific and give examples. For instance, a medical professional might create:
- CME and Medical Education — "Continuing medical education courses, certifications, medical conferences"
- Medical Reference and Subscriptions — "Clinical reference tools, medical journals, databases (UpToDate, Sanford Guide)"
- Professional Development — "Business coaching, non-medical courses, professional education"
Without descriptions, these look similar. With descriptions, the AI knows a Sanford Guide subscription goes under "Medical Reference" while a Kajabi business course goes under "Professional Development."
New categories apply automatically to all future receipts — no further action needed.
Categories (Column C) are your G/L accounts — like "Meals & Entertainment" or "Travel". AI assigns these automatically based on your chart of accounts.
Tags (Column K) are user-defined groupings that cut across categories. A "Las Vegas Trip" tag might include meals, flights, hotels, and Uber rides — all different categories, grouped under one tag.
Quick comparison:
- Categories: Auto-assigned by AI, one per expense, matches your accounting system
- Tags: User-defined, for grouping expenses by trip/client/project across all categories
- AI auto-suggests trip tags: Detects travel patterns and suggests tags like "Las Vegas Trip" overnight
- Project/client tags: Add in Settings > Tags, then assign in the spreadsheet's Tag column
How reports use each:
- Report by Date Range: Pulls expenses from a date period, automatically summarizes by category in a separate tab
- Report by Tag: Pulls all expenses with a specific tag, across all categories and dates
- Year-End Report: Includes every expense for the year (even those already in other reports), with each category on its own tab
Common mistake: don't create tags that repeat category names (a "Meals" or "Travel" tag) — the Category column already handles that automatically. A category answers what kind of expense is this?; a tag answers who or what was it for? "Travel" is a category; "Trip – Bali" is a tag.
Use one tag. A project rarely comes from a single supplier — a launch might involve a venue, a creative studio and an equipment supplier. Three merchants, three categories, one project.
Describe it to the AI Tag Wizard in plain language, e.g. "track expenses for the Harbor Launch project, including travel, materials, venue costs and equipment." The Wizard suggests a tag such as PROJECT | HARBOR LAUNCH | SUBMIT — you review it before anything is created, and creating it doesn't overwrite tags you already use.
The workflow:
- Apply the tag to every expense supporting the project, whichever merchant it came from
- Leave categories alone — Travel stays Travel, Equipment stays Equipment
- Started tagging late? Fix older expenses, or several at once, in Review expenses
- Build the report from My Reports > By Tag
- Each report is a fixed snapshot — later expenses don't silently join one you already made, so create a fresh report for an updated total
For teams: with more than one seat, a Team Admin can push an approved project tag to selected teammates from License Manager > Project Tags. Everyone files against the same project name while keeping their own sheet — sharing the tag shares the label, not the data.
This is expense capture organised by project, not project-management or budgeting software. If it doesn't work the way you need, email support@expensebot.ai and tell us how you'd like it to work.
Use a trip tag — one tag groups every expense from a trip (flights, hotels, meals, rides) across all categories, then one report pulls it all together.
1. Create the trip tag
- From your calendar (easiest): Settings > Tags > "Create tags from your calendar" — the wizard finds travel events and proposes tags like
Trip – Vegas Conferenceautomatically - With AI: "Create a Tag with AI" — describe the trip and it builds the tag
- Manually: add a tag like
Trip – Baliin Settings > Tags
2. Get receipts tagged
- Forwarding a receipt? Add
tag: Trip – Balito the subject line — tagged on arrival - Already in your spreadsheet? Open Create a Report — the AI Grouping Suggestions section detects out-of-town expense clusters and offers to tag the whole group at once
- Calendar-connected tags auto-apply to receipts matching the trip's events
- Anytime: pick the tag from the Tag column dropdown in your spreadsheet
Then run My Reports > By Tag and select the trip tag — every expense from that trip, all categories and dates, in one report. Your manual tags are always safe: AI suggestions never overwrite a custom tag you've set.
Every account starts with two default tags: Business and Personal. They're starting points, not final classifications.
- Business = "this is a business expense, but I haven't sorted it further yet" — think of it as to be classified.
- Personal = "this is not business activity." Personal amounts are never deductible, reimbursable, or part of business profit — and an expense counts as Personal when its category, Tag, or a split allocation is Personal (any one is enough). Business reports exclude Personal by default (editable); the Year-End report keeps Personal visible for review at zero deductible.
- Custom tags = ones you create yourself ("Client: Acme Corp", "Film – Production", "NYC Conference") — specific to your workflow.
The key rule: AI features — the film scanner, persona scanners, the trip tagger — only suggest tags for rows that are untagged or still on a default Business/Personal tag. They never overwrite a custom tag you've set, so your own tags stay put while generic rows get re-tagged. Create your own under Settings → Tags or the Tags wizard.
No. Creating a new tag bundle through the wizard never overwrites a tag you've already assigned. When you save a new bundle through Settings → Manage Tags → ✨ Create a Tag with AI — Realtor, Wedding, Rental Property, Agency, or any custom AI-generated tag — ExpenseBot scans receipts from the last 90 days and only fills in receipts where the Tag column (Column K) is currently empty.
What retroactive apply does NOT do:
- Does not overwrite a tag you assigned manually
- Does not overwrite a tag the AI assigned earlier from a different bundle
- Does not touch receipts older than 90 days
- Does not change tags on future receipts that already get tagged at scan time
You'll see a toast like "5 tags saved. Applied to 37 existing receipts across all tags." — that "37" only counts previously untagged receipts. Your existing categorization is safe; the new bundle just fills the gaps in your untagged history and starts auto-tagging future receipts.
Want a previously-tagged receipt to use the new tag? Open your spreadsheet, find the receipt in the Tag column, click the cell, and pick the new tag from the dropdown. Manual edits always win — the wizard won't touch it again.
Yes — partially. Every account starts with Business and Personal as default tags in your spreadsheet's Tags tab, each with a Description column you can edit. ExpenseBot's classifier reads those descriptions on every receipt and looks for matching patterns in the receipt's text or image. If your description includes Visa 1234 and a receipt prints Visa ****1234, the AI matches and assigns the right tag (confidence 0.8).
The catch — card # visibility varies a lot:
- In-person POS receipts (gas, restaurants, retail): ~95% show the card #
- PayPal / Stripe email receipts: sometimes
- Amazon / online order confirmations: rarely
- SaaS subscription auto-renewals: almost never
Real-world hit rate is roughly 15–50% depending on your mix. The other half is handled by content-based classification — clothing/groceries/streaming → Personal, software/office/professional services → Business.
How to set it up: Open your ExpenseBot spreadsheet → Tags tab. Find the Business and Personal rows in column A. Append to each Description (don't replace the existing content — it's already doing useful classification work):
Also Business when receipt shows: payment by Visa
ending 1234, "Visa 1234", "****1234", or "XX 1234"
Same for Personal with your other card's last-4. The next nightly scan picks it up.
Higher-impact tip: the most accurate users add hints about their actual spending patterns, not just card numbers. Real example from a current user: "Any receipt with a tip present" → Business — that single line correctly tags every restaurant receipt where they entertained a client, regardless of card. Patterns like that work on every receipt because they're based on receipt content, not payment method.
Go to your main ExpenseBot spreadsheet, click the Settings tab, and enter your Employee ID in cell B2. Now all reports will include your Employee ID.
Use the Report Wizard to delete or undo a report:
No — deleting a report does not delete your expenses. Your expenses stay exactly where they are in your master sheet; deleting a report only removes that report's own separate Google Sheet and un-marks the rows it used.
Your master Expenses Google Sheet is the source of truth. The Review Expenses screen is a live view of that sheet — edits in either place stay in sync. Edits you make to category, tags, vendor, amount, dates, or notes are never touched by the app automatically.
What the three tabs mean
Each item on the Review screen is one row in your sheet — the tabs just show its report status:
- Not in reports — available, hasn't been used in a report yet
- In reports — already included in a report you generated
- Omitted — you excluded it; skipped from future reports, but the row and receipt stay untouched
Creating a report stamps the master rows it used with a date in the Submit Date column and greys them, and builds a brand-new, separate Google Sheet just for that report.
Deleting a report is safe. It sends that report's own separate sheet to your Drive trash — it does not touch your master Expenses sheet. Your expenses stay exactly where they are; deleting just clears the Submit Date stamp so those rows flip back to Not in reports and are available again.
A regenerated report only pulls in expenses that aren't already stamped In reports — to re-include expenses from a report you no longer need, delete that report first, then regenerate. Report cards are snapshots frozen at creation time, so editing your master sheet afterward won't change an existing report's totals until you regenerate it.
Correct the recorded transaction without deleting managed history:
Correct a field
Open your master Google Sheet and edit the amount, merchant, category, date, tag, or notes in that row. Review Expenses is a live view of the same data.
Remove a duplicate from calculations
Open Review Expenses and choose Omit. The row and receipt remain available for audit, but the transaction is excluded from future reports, year-end and tax calculations, exports, analytics, Cash Radar, and scheduled summaries. You can restore it later.
Need a fresh extraction?
Contact ExpenseBot Support from the app and identify the receipt. Support can reprocess the source safely without asking you to delete managed rows or change ExpenseBot's Gmail labels.
For Finance Teams
Adding Teammates
You can add teammates any time from Settings — no need to reset your account or start over.
ExpenseBot has one seated product. Your seat is seat 1 — you're already paying for it. Adding a teammate adds another seat. Two or more seats automatically turns on team management.
Go to Settings → Invite your team, choose how many teammate seats to add, and pick your billing interval — $10/seat/month or $100/seat/year. You can start with one extra seat (just you + one teammate) and add more later.
License Manager then appears in your sidebar so you can invite teammates by email, assign seats, and sync G/L accounts and tags across everyone. Accountants who add teammates keep their accountant view and get a three-way toggle (Accounting / Team / Expenses) to move between client books, team licenses, and their own expenses.
After upgrading to Teams, the License Manager appears in your sidebar. From there you can invite teammates by email, assign seats, and sync G/L accounts and tags across your whole team.
Corporate Card Reconciliation
Connect your corporate cards via Plaid and ExpenseBot automatically syncs transactions each month. The system matches receipts captured via Gmail scan to statement lines — by the time the statement arrives, 80–90% of receipts are already matched. Unmatched charges are flagged in the admin dashboard, and one click sends a reminder to the cardholder listing their missing receipts.
If you prefer not to connect via Plaid, download your corporate card statement from your bank and upload it as a PDF or CSV under My Reports → Review expenses → Match card activity. Uploads work one statement at a time, month by month — no bulk upload, but no cap on how many months you can do sequentially. Works with any bank, in any format.
Invite Clients
Communication & Collaboration
Leave comments on individual expenses or add notes about the entire report:
Compliance & Controls
Upload your policy PDF and ExpenseBot evaluates any report against it instantly.
Export & Integration
ExpenseBot integrates with a wide range of accounting software:
- QuickBooks Online: Direct one‑click sync for both expenses and invoices
- Xero: Export formatted for easy import
- Sage 50 Canada: Export ready‑to‑import files
- Sage 50 USA: Export ready‑to‑import files
- Sage Intacct: Export with automatic dimension mapping
- FreshBooks: Export with automatic G/L mapping
- Zoho Books: Export with custom field mapping
- NetSuite: Export formatted for NetSuite import
- Microsoft Dynamics Business Central: Export with G/L account mapping
Our AI export maps expenses to the correct G/L accounts for any accounting system, saving hours of manual categorization.
Class and Customer are set in the export dialog when you push a report to QuickBooks — you pick them once and they apply to every line item in that push. Works with all three export types: Bill, Purchase, and Invoice.
Recommended workflow:
- Organize reports so all rows share the same grant, donor, or project
- Click Push to QuickBooks on the report
- In the export dialog, pick Class (e.g. the grant or department) and Customer (e.g. the donor or client)
- Confirm — every line item is tagged automatically
No per-row tagging needed. Ideal for nonprofits tracking restricted grants, consultants billing to multiple clients, or any org splitting costs by department or project. Classes and Customers are fetched live from your QBO account so the dropdowns always reflect your current setup.
Yes. Smart routing handles mixed reports automatically at push time — you don't need to separate receipts and invoices into different reports anymore.
- Already-paid receipts → QBO Purchase posted against your bank/credit card account (bank-feed match-ready, no duplicate risk)
- Unpaid vendor invoices → QBO Bill payable to the vendor, one Bill per vendor with invoice rows as line items
- Out-of-pocket reimbursements → QBO Bill payable to the staff member
Before anything lands in QuickBooks, the push dialog shows a preview: "We'll create X already-paid expenses + Y unpaid bills payable to [vendor list]." Confirm or adjust — nothing is created until you approve.
Yes. When a report is pushed to QuickBooks, the original receipt document — PDF, Gmail receipt image, or scanned attachment — is automatically attached to the QBO transaction record. No manual upload in QuickBooks after the fact.
The attachment appears on the Purchase or Bill record in QBO, the same way it would if you had uploaded it manually via QuickBooks' own Attach button.
This is particularly useful for:
- Nonprofits managing government grants — auditors expect documentation attached to the expense record, not filed separately
- Outsourced bookkeepers — the QBO file is the complete audit trail; no separate receipt archive to maintain
- General expense workflows — the attached receipt is available for instant review when a question comes up about a specific transaction
Yes. In the QuickBooks push dialog, set Class = grant program and Customer = funder/donor. These apply to every line item in the push automatically — no per-row tagging. The recommended workflow is one ExpenseBot report per grant so you set Class once per push. Classes and Customers are pulled live from your connected QBO account. Class tracking is available on QuickBooks Online Plus and Advanced. Receipt PDFs attach to each QBO transaction at push time, supporting grant audit documentation requirements.
Yes. IRS Publication 463 explicitly allows self-employed individuals to use the standard meal allowance (the same federal GSA rates) instead of actual restaurant receipts for business travel. You still need a travel log showing the date, destination, and business purpose of each trip. The 50% meal deduction limit applies at tax-filing time on Schedule C line 24b — so a $68/day per diem becomes a $34 deduction. ExpenseBot's per diem tracker applies the 50% cut automatically and saves the audit trail to your expense spreadsheet.
When you travel for business, IRS Publication 463 limits your departure and return days to 75% (three-quarters) of the standard M&IE rate. For the $68/day standard CONUS rate, your first and last travel days are worth $51 each. For the $92/day NYC/SF/DC rate, those days are worth $69. The rule applies regardless of what time you depart or arrive. ExpenseBot handles this automatically — toggle a day as a travel day and the 75% is applied; the per-day meal checkboxes are greyed to indicate the rule is in effect.
The GSA FY2026 standard CONUS M&IE rate is $68 per day. High-cost non-standard areas reach $74, $80, $86, or $92 per day depending on the city. New York City, San Francisco, Washington DC, and Chicago are among the top-tier cities at $92/day. FY2026 rates run October 1, 2025 through September 30, 2026. Self-employed individuals can use these same federal rates for Schedule C meal deductions — they are not limited to employees.
Yes. ExpenseBot is listed in the ChatGPT app directory — search "ExpenseBot" in ChatGPT's Apps section (or open the listing) and click Try in chat. Sign in with the Google account you use for ExpenseBot and you're connected in one click — no token or config needed. Requires a paid ChatGPT plan; create your free ExpenseBot account at expensebot.ai first.
Beyond ChatGPT, ExpenseBot publishes two MCP (Model Context Protocol) servers on the official MCP Registry, letting Claude Desktop, Cursor, Claude.ai, and any MCP-compatible AI assistant work directly with your ExpenseBot account.
What you can do from your AI assistant:
- Search expenses ("show me my Amazon receipts over $50 from last month")
- Submit photo or PDF receipts conversationally
- Scan Gmail for receipts on demand
- Create and share expense reports
- Run deep analytics ("compare Q1 vs Q2 spending")
- Add cash expenses without a receipt
- Check tax deductibility for purchases
- Trace what happened to a missing receipt or invoice — 44 tools total (43 on the remote connector surface)
Setup (3 minutes): Go to Settings → AI Assistant Tokens → Generate. Paste the token into your AI client's config. For Claude Desktop, edit claude_desktop_config.json and add:
{
  "mcpServers": {
    "expensebot": {
      "command": "npx",
      "args": ["-y", "@expensebot/mcp-server-auth", "--token=YOUR_TOKEN"]
    }
  }
}Find both servers on the official MCP Registry — search "ExpenseBot". ExpenseBot is the first expense management tool in the registry. Learn more and install the ExpenseBot MCP server →
ExpenseBot features a direct API integration with QuickBooks Online — not just an export. Connect once through our guided wizard via direct OAuth from your ExpenseBot dashboard, and expenses sync automatically with one click.
QuickBooks integration features:
- One-click sync: Submit your expense report and it creates a bill in QuickBooks instantly
- AI vendor matching: Automatically matches expenses to existing QuickBooks vendors
- Smart GL mapping: AI maps expense categories to your QuickBooks chart of accounts
- Invoice handling: Vendor invoices become individual bills; receipts consolidate into one bill
- Billable expenses: Track client-billable expenses for easy reimbursement
- Receipt attachments: Original receipts attach directly to QuickBooks bills
Unlike export-based integrations, the QuickBooks API sync means no manual file uploads or imports — just click "Submit to QuickBooks" and the bill appears in your accounting system, ready for payment.
Team Administration
Admins can manage licenses, sync G/L accounts, and standardize tags across the team:
Administrator Capabilities:
- Assign Licenses: Allocate licenses to team members
- Sync G/L Accounts: Keep consistent accounts across your organization
- Manage Tags: Create and sync project/client/department tags
- Team spending insights: Ask the chat assistant questions like “Summarize my team spending this year”
These features ensure consistency while saving time through AI automation.
Upload your company's expense categories and G/L accounts to ensure consistent coding across all team members:
Purchase multiple licenses at once and assign them to team members:
Tax & Year‑End Reports
Coverage has five product/tax layers plus a separate bank-connection boundary — all real, but not the same thing:
- Receipt & expense tracking + home‑currency reports — 50+ countries
- Country‑specific tax‑deduction guidance — 43 countries
- Detailed Tax Form Summary worksheet — 8 countries (US, Canada, UK, Australia, Ireland, New Zealand, Germany, France)
- Reviewed filing worksheets (Beta) — 2 countries: Australia (ATO/myTax) and the UK (SA103F)
- Filled government self‑employment forms — 2 countries: US (Schedule C & SE) and Canada (T2125)
- Plaid bank & card connections — US and Canada only
Every supported country gets the Year‑End Tax Wizard; the deduction engine and government forms layer on top where available. Being a supported country doesn't by itself include bank connections, deduction rules, filing worksheets, or filled forms — those are the separate tiers above.
The Australia and UK filing worksheets are Beta and do not submit a return. Review every figure and email support@expensebot.ai if anything looks wrong. Tax figures are estimates — confirm with your tax professional.
Generate a complete year‑end tax report in one click from My Reports — all expenses categorized, deductions calculated, and receipts attached. The result is a comprehensive spreadsheet ready to hand to your accountant or upload to tax software; if you change expenses afterwards (add, recategorize, split, or omit), regenerate it so the numbers stay current.
Unlike regular reports (which only include unassigned expenses), the year‑end report includes every expense for that year — even those already in other reports. Each category gets its own summary tab.
What's included in your year‑end tax report:
- Expense summary by category: Travel, meals, office supplies, subscriptions, and more
- Mileage log: Complete IRS-compliant record of all business miles
- Deduction calculations: Business use percentages already applied
- Receipt documentation: All receipts attached and organized
- Tax filing handoff: filled Schedule C & SE (US), filled T2125 (Canada), or a reviewed Beta worksheet for ATO/myTax (Australia) and SA103F (UK)
For US freelancers, ExpenseBot can pre-fill your Schedule C with expense totals by category. Canadian freelancers get the T2125 Statement of Business Activities. Australian sole traders and UK self-employed users can review a Beta worksheet that organizes Year-End figures for ATO/myTax or SA103F entry. The worksheets do not file or lodge a return; review them carefully and email support@expensebot.ai if a figure or filing label looks wrong.
Yes. For GST/HST-registered Canadians, ExpenseBot reads the GST/HST off every receipt and computes the claimable input tax credit (ITC) per receipt using ITC = tax paid × business-use % × deductible %, then reduces the deductible expense base by the recovered ITC (you can't also deduct tax you're getting back as a credit).
- Province-aware “GST/HST paid (ITC claimable)” summary on reports — GST, HST, or a GST + provincial split
- The 50% meals limit is applied to the ITC on client meals
- India GST users get CGST/IGST lines for GSTR-3B
ExpenseBot computes and displays your ITCs so the numbers are ready to transcribe onto your GST34 return — it does not file the return for you. Learn more on the input tax credit tracker page.
Many expenses are only partially deductible when used for both business and personal purposes. ExpenseBot lets you configure the business use percentage for each expense category, and automatically calculates the deductible portion.
Common partial deduction examples:
- Internet: 50% if you work from home half the time
- Cell phone: 70% if mostly used for business calls
- Home office: Based on square footage percentage
- Vehicle: Based on business vs. personal miles driven
- Meals: 50% deductible for business meals (IRS rule)
Set these percentages once in your expense category settings, and ExpenseBot applies them automatically to every expense in that category. Your year-end tax report shows both the full expense amount and the calculated business deduction.
Yes. Software and SaaS subscriptions used to run your business are ordinary and necessary business expenses under IRC §162(a) — see IRS Publication 334, Tax Guide for Small Business — and on the cash basis you deduct them in the year you pay.
There is no dedicated software line on Schedule C. Most recurring SaaS sits in Line 18 (Office expense); anything that doesn't fit goes to Line 27b (Other expenses), itemised in Part V. Where a tool serves both work and personal life, you deduct the business share rather than the whole charge.
Full guide: Are software subscriptions tax deductible?
Estimates — confirm with your tax professional.
You deduct the business portion, worked out by a method you can explain and then apply consistently — not the full amount, and not nothing.
Worked example: a $240/year cloud storage plan where 6 of the 10 stored folders are client projects → $240 × 0.6 = $144 deductible. The stated method is the defensible part, not the number.
In ExpenseBot you set this once: Settings → Expense Categories, then the Business % field on the relevant category. Every expense in that category carries the split automatically, and the year-end report shows both the full amount paid and the calculated business deduction.
Estimates — confirm with your tax professional.
Home office expenses are only partially deductible — you can only claim the portion of your home you use exclusively for business. ExpenseBot lets you set a single home office percentage once, then applies it automatically to every relevant expense.
How to calculate your home office %:
The standard method is square footage: (business sq ft ÷ total home sq ft) × 100. Example: a 200 sq ft office in a 2,000 sq ft home = 10%.
Which categories typically use the home office %:
- Rent or mortgage interest
- Utilities (electricity, gas, water)
- Internet and phone (home line)
- Home insurance
- Property tax
- Home repairs and maintenance
Configure it once in Settings → Expense Categories and ExpenseBot applies the percentage to every expense in those categories. Your year-end tax report shows both the full expense AND the calculated deduction — feeding into Form 8829 → Schedule C for US freelancers, or the business-use-of-home section of T2125 for Canadian freelancers.
Note: Both the IRS and CRA require the space to be used regularly and exclusivelyfor business to claim these deductions.
Yes — ExpenseBot tracks income alongside expenses. Four input methods feed a single Income tab in your spreadsheet, and a reconcile-with-bank step keeps everything in sync.
Four ways income gets in:
- Gmail income detection (live, on by default): The same Gmail scan that captures your receipts also picks up emails about money you've received — Stripe payouts, Cash App for Business, Zelle / Venmo / Square / PayPal Business / Interac e-Transfer, invoice-paid confirmations, rent receipts — and writes them to the Income tab automatically. To turn off: Settings → Gmail Automation → uncheck "Also track income emails (beta)". Your expense scanning stays on if you do that — only the income side stops.
- Bank connection (live): Connect your bank and ExpenseBot reconciles deposits against your Income tab on a regular cadence. Deposits from known platforms — Stripe, PayPal, Venmo, Zelle, Square, Etsy, Airbnb, and others — are auto-flagged as income. Anything that doesn't match an existing entry surfaces as "potential income" for review. Business income auto-fills Schedule C Line 1 (or T2125 Line 7 for Canada).
- Add Income — voice, screenshot, PDF, CSV, or manual entry (live): Tap the Add Income button to log any payment that didn't come through your bank or Gmail. Five input modes feed the same review-and-save flow:
- Voice — describe what came in ("$400 cash from Friday's gig plus $80 in Venmo tips") and the AI splits it into separate entries with the right payment method, payer, and category.
- From screenshot or PDF — upload a screenshot of an Apple Wallet payment list, an OnlyFans subscriber export, or a multi-page PDF statement (Cash App monthly, Stripe payout, PayPal monthly, Square deposit summary, generic bank statement). Gemini reads the rendered layout — including multi-page tables — and returns one row per visible payment.
- From CSV — drop a transaction CSV from any payment or creator-economy platform (Cash App, Clips4Sale, Throne, Patreon, Ko-fi, Gumroad, Fansly, Stripe, PayPal, Venmo, Square, etc.). The AI auto-detects the columns regardless of layout, locale, or currency — no manual column mapping. Caps at 500 KB; for large backfills, split into smaller files (one month at a time works well). Excel users: ExpenseBot accepts CSV/TSV/TXT but not Excel (.xlsx) directly yet — open your file in Excel or Google Sheets and use File → Save As → CSV (about 10 seconds), then upload that.
- Manual entry — pick a category (royalty, freelance, rental, sales, etc.), source, date, and amount.
- Refunds are tracked too. When you record a customer refund (money you sent back to a customer who previously paid you), it lands as a negative-amount row on the Income tab with the right Schedule C Line 2 / T2125 Line 8290 routing — and dedupes against any email-detected refund of the same event so you never get a duplicate row. Same convention whether the refund came in via Gmail, CSV import, PDF import, or manual entry.
- Schedule C / T2125 worksheet (live): The year-end report's worksheet tab lets you fill in gross receipts, returns and allowances, and other income directly — useful for catch-up entries, prior-year corrections, or any source not already captured.
Reconcile with bank: once a month (or anytime, on demand), click Reconcile with bank to compare your Income tab against the deposits in your linked bank account. ExpenseBot lists every gap and lets you accept, edit, or ignore each one in seconds. Your year-end report shows a reconciliation status (✓ once you've reconciled at least 83% of months) so your accountant knows whether the totals are bank-verified.
No double-counting. When the same payment shows up across multiple sources — say, a Stripe email and the Stripe deposit hitting your bank — ExpenseBot's matcher recognizes them as the same event and only counts it once. The Income tab is the single source of truth; manual entries, Gmail-detected income, bank reconciliation matches, and year-end worksheet adjustments all flow through it.
Yes — automatically for Cash App, Venmo, Zelle, and Interac e-Transfer. When ExpenseBot's Gmail scan sees an outgoing payment from one of these platforms to someone who previously paid you, it writes a negative-amount row to your Income (Beta) tab with reference refund-of:<original_record_id>. The original incoming row is left untouched, so you keep both the receipt and the refund as audit evidence.
Net income on Schedule C / T2125 sums all rows including the negative — so a $1,000 receipt followed by a $200 refund nets to $800. This matches IRS Schedule C Line 2 (Returns and allowances) and CRA T2125 Line 8290 reporting convention: refunds are reported as separate adjustments, not by reducing the gross receipts line.
What if the recipient never paid me before? No row is written. Most outgoing peer payments are personal (paying a friend back, splitting a bill) and don't belong on a business books spreadsheet at all.
For platforms not yet auto-detected (PayPal personal sends, wires, cash), log the refund through any of these manual paths — all three produce the same negative-amount Refund-issued row with the correct refund-of:<original_record_id> reference:
- Add Income → manual entry — set category to "Refund issued" and enter a negative amount.
- Add Income → From CSV — drop in a CSV that contains refund rows. The AI auto-detects refunds (negative amounts or "refund" descriptions), tags them as Refund issued, and resolves the cross-link to the original income row by payer match.
- Add Income → From screenshot or PDF — same behavior: refund rows in a Cash App / Stripe / PayPal monthly statement get extracted as negative-amount Refund-issued rows.
All three paths share dedup with the Gmail-scan refund detector — if the same refund event later shows up in your Gmail and we already wrote the row from a CSV import, the email-side scan skips it instead of creating a duplicate. Same in reverse. You won't get double-counted regardless of which path the refund came in through.
Yes. When you connect your bank, every deposit runs through a 4-layer matcher against your existing Income tab so the same payment doesn't get double-counted.
The 4-layer matcher:
- Entity ID match — exact platform transaction IDs first (Stripe
ch_..., PayPaltxn_...). - Normalized merchant match — payer names stripped of punctuation, case, and noise tokens before comparison.
- Token-subset match — handles "Stripe Inc" on the email vs "STRIPE" on the bank.
- AI canonicalization — for edge cases like "PayPal *Etsy" on the bank vs "Etsy" in the email, Gemini canonicalizes both sides to the same merchant.
Anything that doesn't match surfaces as a potential income gap. Click Reconcile with bank monthly (or anytime) to walk every gap one by one:
- Accept — add it to the Income tab as a new entry
- Edit — adjust merchant, category, or amount before adding
- Ignore — for transfers between your own accounts, refunds, or anything else that's not income (the ignore rule sticks for that source going forward)
Matched income flows into the right tax form automatically: Schedule C Line 1 / T2125 Line 7 for gross business receipts, Schedule B / T5 for interest and dividends, Schedule E / T776 for rent (routed by property tag). The year-end Bank Summary tab shows your reconciliation status — ✓ Reconciled at ≥83% of months — so your accountant knows the totals are bank-verified.
HUD Medical Expense Deductions
Yes — ExpenseBot has a dedicated HUD Medical Recertification Report. If you're in Section 8, public housing, Section 202, or Section 811 housing and the head of household is 62+ or disabled, federal law (24 CFR 5.611) lets you deduct unreimbursed medical expenses from the income your rent is based on. Every $1,000 documented saves roughly $25/month off your rent.
Setup takes five minutes: create a Health & Medical tag using the AI wizard (type "HUD medical") and ExpenseBot automatically scans your Gmail for qualifying receipts — prescriptions, copays, doctor visits, hearing aids, Medicare premiums, and service animal expenses. Run a historical scan to catch up on the past year, then generate an itemized worksheet ready to hand directly to your housing coordinator.
For detailed guidance on exactly what qualifies, how Medicare premiums are entered, how to preview your rent savings, and how the recertification date window works — ask our AI assistant.
Tips & Best Practices
Receipt Management
Write special prefixes on receipts before photographing. ExpenseBot's AI reads your handwriting and automatically processes them — no manual entry required after upload.
What to write on your receipts:
- TAG:ClientName — Creates a new tag or groups to an existing one. Examples: "TAG:Acme Corp", "TAG:NYC Conference", "TAG:Project-123"
- w/ Names — Adds attendee names to the notes field. Example: "w/ Colin & Rebecca" puts "Colin & Rebecca" in the expense notes — perfect for tracking who attended business dinners
This simple technique saves hours of manual categorization. Write "TAG:Acme" on all receipts for that client, and they're automatically grouped together for easy reporting. Write "w/ John Smith" on dinner receipts to document who you met with. Perfect for freelancers tracking multiple clients, consultants billing projects, or anyone who needs to document business meal attendees.
Sometimes — it depends which of two buckets the expense falls into.
The two buckets:
- Ordinary business expenses (supplies, subcontractors, professional fees, software, rent) — under the Cohan rule, a court may accept a reasonable estimate if you can show the expense was genuinely incurred.
- Travel, meals, gifts, and vehicles — IRC §274(d) requires strict records of amount, time, place, and business purpose, and it supersedes the Cohan rule. No records usually means no deduction here, however honest the claim.
When a receipt is gone, evidence still ranks by strength: the original receipt, then the merchant's confirmation email, then a vendor-reissued invoice, then a bank statement paired with a calendar entry, and last a written reconstruction. A bank statement alone proves amount, date, and payee — but not business purpose, which is the thing usually being tested.
Merchant confirmation emails are the most commonly overlooked source, which is why ExpenseBot scans your Gmail for receipts and writes them into a Google Sheet you own. See our full guide to deductions with no receipts. Estimates — confirm with your tax professional.
Quick Tips
- After submitting a photo of a receipt to ExpenseBot, you can delete it from your camera roll.
- For restaurant receipts, include the itemized receipt and the credit‑card slip in the same photo to capture tax, tip, and total.
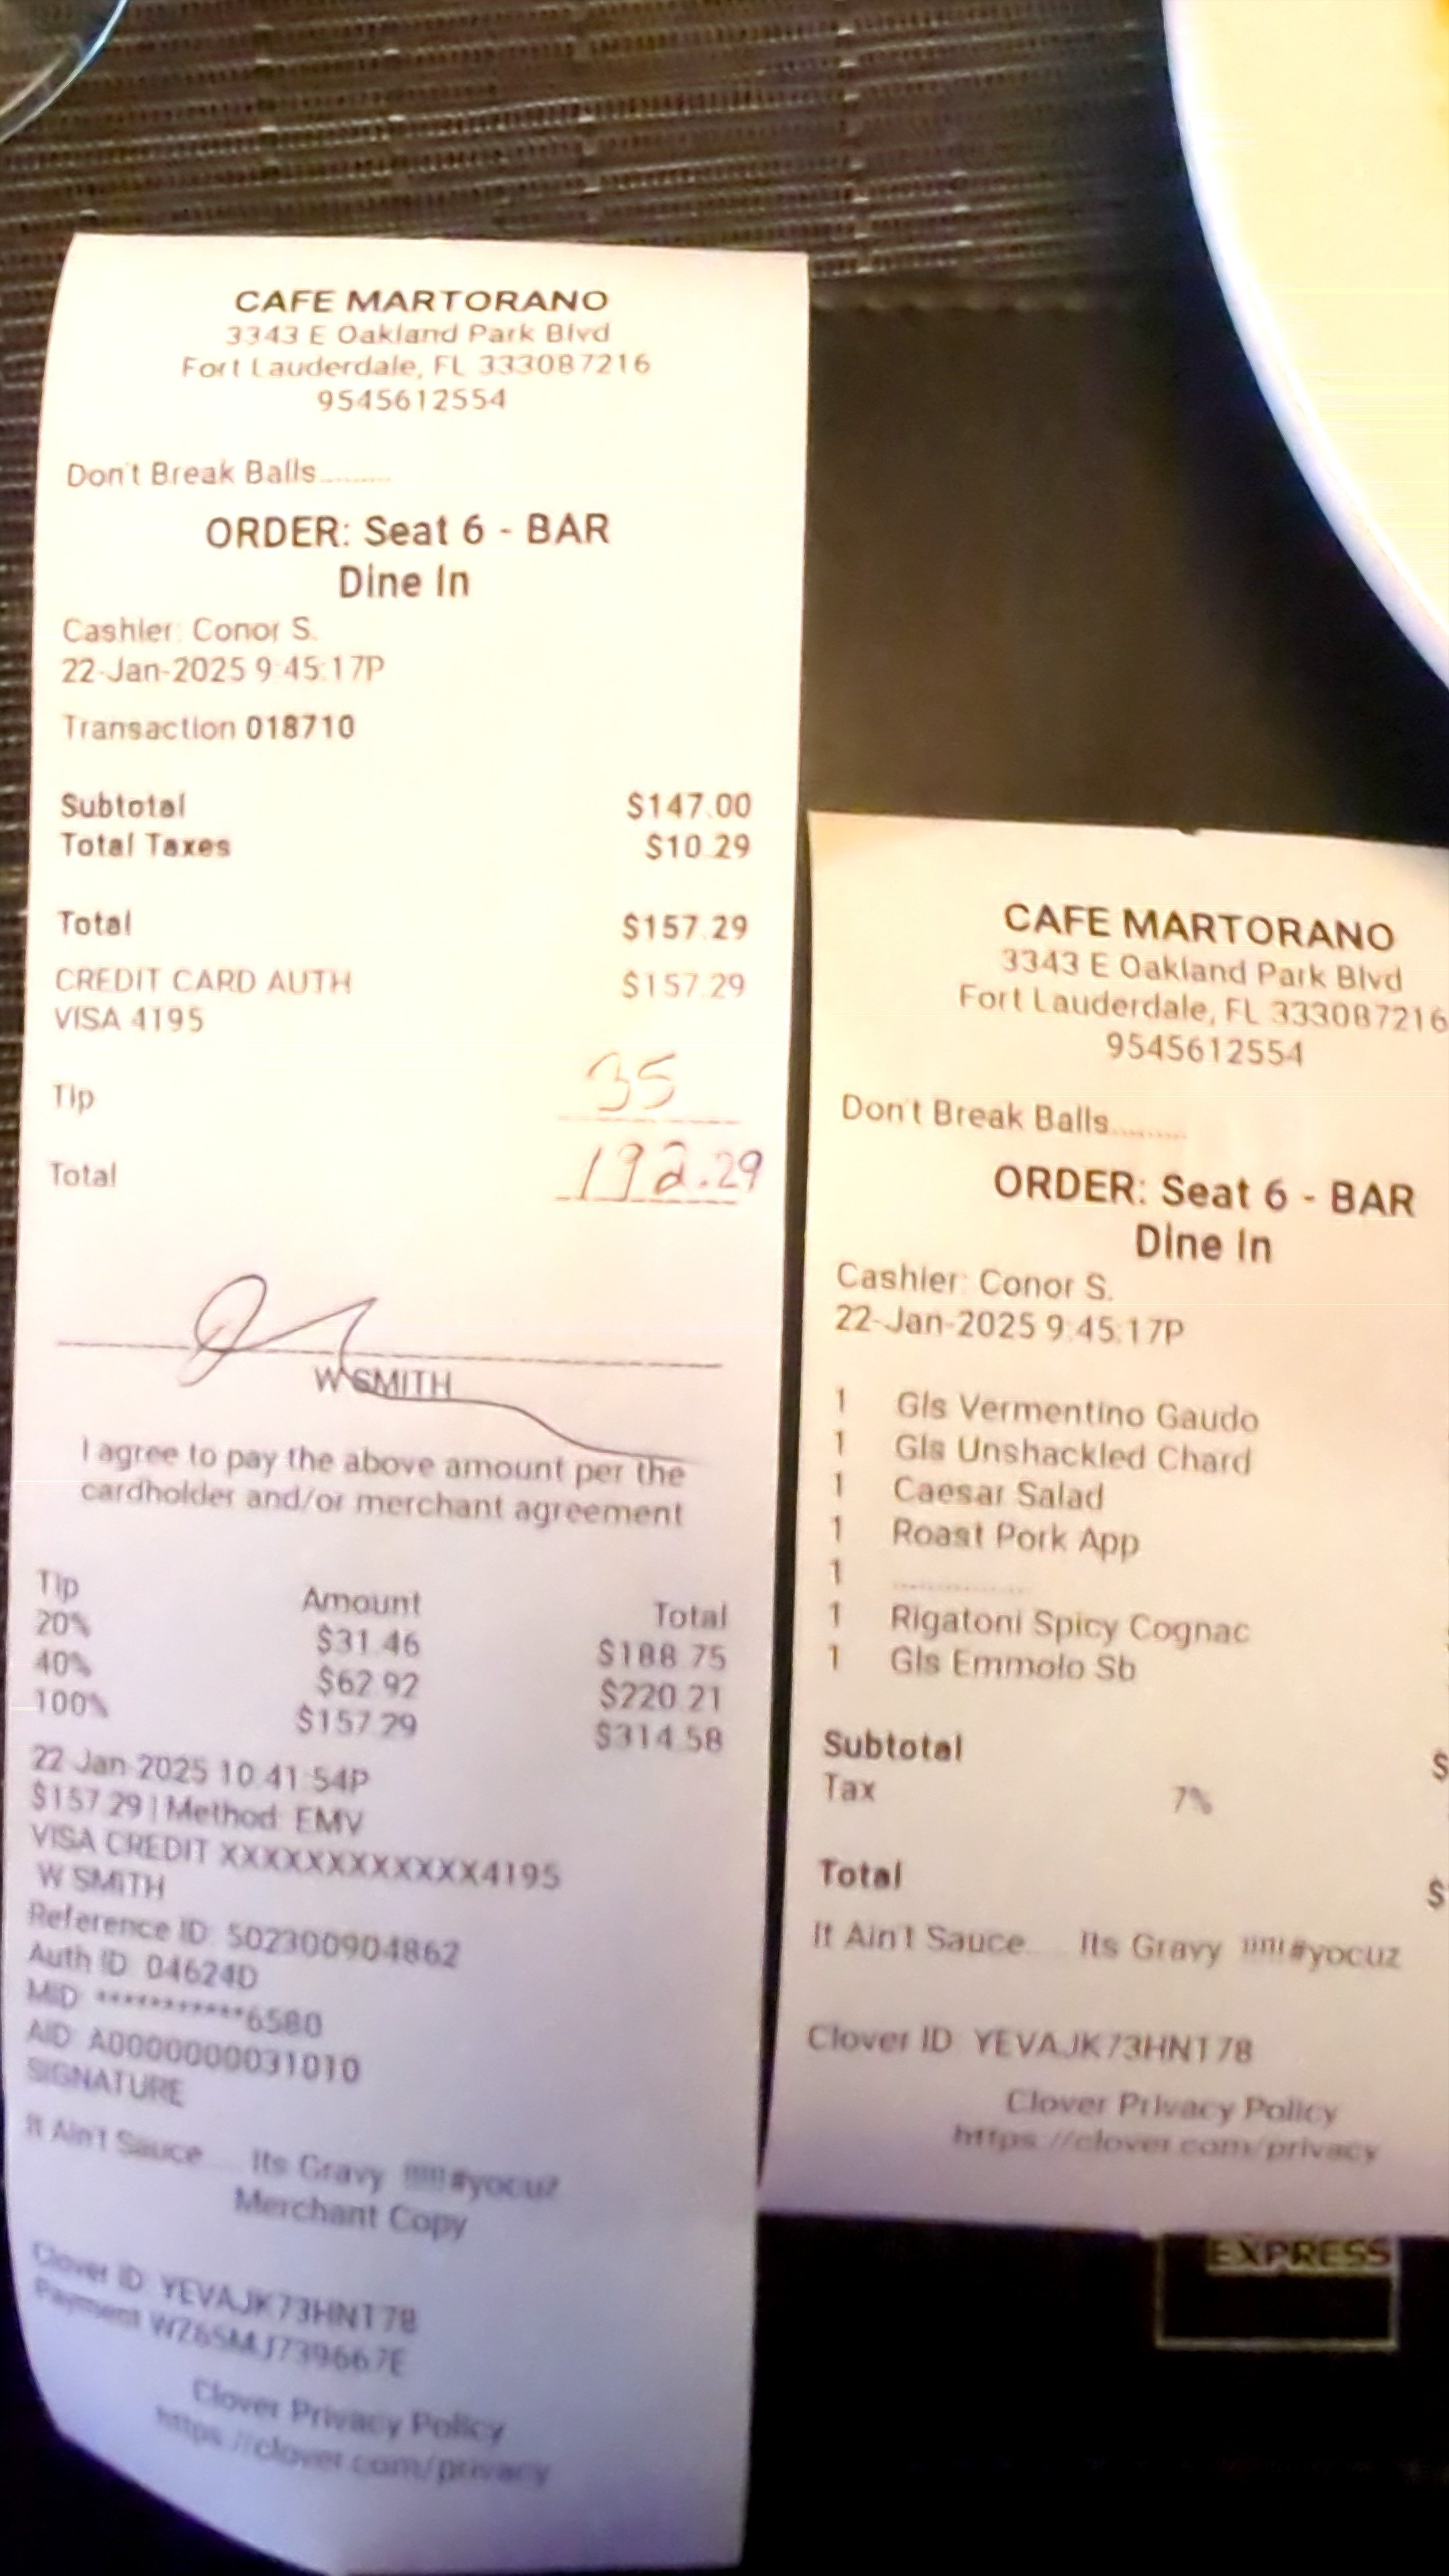
Organization Best Practices
- Invite someone to approve or review your reports.
- Review yellow highlighted cells to check AI suggestions.

- All ExpenseBot data is stored in your Google Drive "ExpenseBot Expenses" folder.
Still researching? Try it free.
60-day free trial. No credit card required. Cancel anytime.
Privacy & Security
ExpenseBot uses a privacy-first approach: your receipt images, spreadsheets, and generated reports are stored in your own Google Drive under your control. To operate the service, ExpenseBot securely stores limited account and operational data such as your profile and settings, Google authorization tokens, Drive file and folder IDs, processing and duplicate-prevention metadata, and billing IDs. Receipt and email content is processed only to deliver the features you request, and temporary processing copies are removed after processing. ExpenseBot does not sell your data or use Google Workspace data to train generalized AI models.
CASA (Cloud Application Security Assessment) is the independent security assessment framework used in Google's restricted-scope review process. ExpenseBot completed its 2026 assessment in April through ESOF AppSec (TAC Security), a CASA-authorized independent assessor. The assessment covered:
- Secure secret management and credential handling
- HTTPS-only connections with TLS 1.2+ encryption
- Secure cookie configurations
- Protection against common attack vectors (XSS, CSRF, injection)
- External penetration testing with verified pass results
- 54 OWASP-based security controls documented and validated
Apps that handle restricted Google data are reassessed annually. A successful CASA assessment validates the controls in scope; it is not a blanket Google endorsement of the product.
Gmail scanning is optional — you connect it separately and can turn it off at any time under Settings. When enabled, ExpenseBot uses automated search and classification to identify likely receipts and invoices, then processes the relevant message content and attachments for expense capture. It does not send or delete your email, sell Gmail data, use it for advertising, or use Google Workspace data to train generalized AI models. Our Gmail API usage complies with Google's Limited Use Requirements.
Receipt photos and PDFs land in your own Google Drive (in the ExpenseBot folder we create on your account) — not on our servers. We pass each file through our processing pipeline briefly to run OCR and category classification, then upload the final image to your Drive and remove the temporary copy. ExpenseBot does not retain your receipt images on our servers. Your original photos in Google Photos are never modified or deleted — we only read them when you explicitly use the "Find Receipts in Google Photos" import.
You control access to the files in your Google Drive through Google's sharing settings. ExpenseBot's service can access data under the permissions you grant when needed to run a feature, and authorized support personnel may access limited account or diagnostic information when needed to resolve an issue. Accountants, managers, or teammates can see data only when you share it with them or authorize the relevant client or team relationship.
Yes. Cancelling stops the subscription but does not delete the spreadsheets, receipts, or reports stored in your Google Drive; they remain there until you choose to delete them. You can also revoke ExpenseBot's Google access to stop future processing. There is no export fee because the working files are already in your Drive.
Yes, under Settings, choose Reset Account to delete the ExpenseBot folder on your Drive and start fresh. This won't affect your subscription status. You can also revoke ExpenseBot's access entirely from your Google Account permissions at any time.
Support
Troubleshooting
If you see "Notification permission denied", your browser has blocked notifications for ExpenseBot. This is a browser-level setting that the app cannot override — only you can re-enable it.
How to fix it:
- Chrome (Desktop): Click the tune icon in the address bar → Site settings → Notifications → change from Block to Allow
- Chrome (Android): Tap the lock icon → Permissions → toggle Notifications on
- Safari (Mac): Safari → Settings → Websites → Notifications → find expensebot.ai → Allow. Also check System Settings → Notifications → Safari
- Firefox: Settings → Privacy & Security → scroll to Permissions → Notifications → click Settings → find expensebot.ai → change to Allow → Save Changes
- Edge: Click the lock icon next to the address bar → Permissions for this site → set Notifications to Allow
- DuckDuckGo Browser: DuckDuckGo Browser does not support web push notifications. This is a browser limitation, not a settings issue. Please use Chrome, Firefox, Safari, or Edge instead
After changing the setting, go back to ExpenseBot Settings and toggle push notifications on. See Google's guide on managing notifications for more details.
Yes. ExpenseBot tracks both income and expenses for self-employed content creators, including YouTubers, TikTokers, OnlyFans/Fansly creators, Twitch streamers, podcasters, and musicians. Gmail scan picks up platform payouts (Stripe, PayPal, Venmo, CashApp, direct platform deposits) alongside Schedule C / T2125-eligible expenses (camera gear, lighting, props, costumes, software subscriptions, home studio percentage, contractor payments). No-judgment treatment of every category. See the content creator landing page for setup.
Yes — and especially now that Splitwise went paid in 2025 ($40/year, with a 3–5 expense/day cap on the free tier). One partner signs up for ExpenseBot and adds the other's email as a verified forwarding address — no account needed on their side. Both forward receipt emails from their own inboxes; ExpenseBot auto-detects who paid from the sender, categorizes the spend, and writes every receipt to a shared Google Sheet in your Drive with the image attached. Month-end Partnership Spend Report shows who paid what and who owes whom. See /splitwise-alternative and /shared-expense-tracker.
Yes. Tag any receipt as "reimbursable", group by client, and ExpenseBot generates a clean expense invoice with the original receipts attached in one click. Built for freelancers, consultants, and contractors who pass-through travel, software, and ad spend to clients. The invoice deliberately has no tax line in v1 — consult your accountant for VAT/GST/sales-tax handling. See /reimbursable-expense-invoice.
Open Settings → Expense Organization → Manage Tags → Tune Personal rules. Five questions, about 90 seconds. Tell us your personal card last-4, what you buy on Amazon for family, your streaming subscriptions, and key personal-life signals (kids, pets, household). Matching receipts get the Personal tag while useful expense categories such as Medical or Donations stay intact. You can reopen the same wizard whenever your spending patterns change.
Fix that row by choosing the right Category and Tag in your spreadsheet. If the same pattern keeps recurring, open Settings → Expense Organization → Manage Tags → Tune Personal rules; the wizard updates both Personal category and tag guidance. Its optional retroactive action applies the Personal tag only, so review old categories separately. For one-off forwarded receipts, add tag: Personal or tag: Business anywhere in the email subject for a guaranteed tag override.
Personal and Omitted mean different things. An expense is Personal when its expense category, Tag, or a split allocation is Personal. It stays available for review, but it is not deductible, reimbursable, or part of business profit. Omit is for a whole transaction that should stay in your records but be left out of future ExpenseBot calculations.
Example: if a $100 receipt is split into $70 Office supplies and $30 Personal, business reports count $70. If a duplicate $75 hotel receipt was imported twice, omit one copy; the row and receipt remain available, but only one $75 expense counts.
User-created reports: Date Range reports exclude the Personal Tag and Personal expense category by default, and you can edit both exclusions before preview. If you deliberately include Personal activity, it appears separately as Personal - not claimed, with distinct Business / claim and All selected totals. Report by Tag remains scoped only to the Tag you chose.
Year-End: reads the complete master ledger for the selected year, including expenses already used in another report. Personal amounts may be shown for review but never flow into deductible tax lines. Omitted rows are not exposed individually; only an optional count is shown. Business and personal portions of split receipts remain separate. If a relevant classification changes, ExpenseBot asks you to regenerate the report.
Business P&L and Cash Radar: use business activity for revenue, expenses, and profit. When nonzero Personal spending or owner funding is excluded, the result explains the amount. Owner contributions are cash added, not revenue. Personal-mode reports instead use Income, Spending, and Surplus / shortfall language and retain personal spending.
Use Review expenses to correct a Personal category or Tag, open the Omitted view there to restore an expense, or use Review incometo restore omitted income. Already-generated reports are snapshots; regenerate a stale Year-End report after correcting its source data.
Google Sheets is better for most freelancers and small businesses. It's free, works on any device, and integrates with Google Drive for receipt storage. Excel is better if you're in the Microsoft 365 ecosystem, need Power Query for complex data transformation, or require fully reliable offline access. For expense tracking specifically — where mobile capture and accountant sharing matter most — Sheets wins on practical convenience. Both tools share the same ceiling: they become burdensome past about 100 receipts per month, at which point automated tools like ExpenseBot are a better fit.
When manual entry takes more than 30 minutes per week, when you're consistently missing deductions because receipts aren't captured in time, or when tax preparation takes a full day of spreadsheet cleanup. At roughly 100 receipts per month, the time cost of manual entry exceeds the cost of automated tools. ExpenseBot scans Gmail for receipts automatically, categorizes to Schedule C, and writes to a Google Sheet — eliminating the manual entry problem that makes spreadsheets burdensome at scale.
Post on r/ExpenseBot — our team reads every thread. Bug reports and feature requests get tracked and upvoted by the community.
How to Get Help
Email Support
Our team is available Monday–Friday, 9 AM–6 PM EST.
Documentation
Browse our guides and tutorials in the sections above.
Response Times
We typically respond within 24 business hours.
For urgent matters, include "URGENT" in your email subject line.